Mapping a Panel

Allrighty, today we talk about . . . panel mapping.

Any house that has electricity has a panel full of circuit breakers, and it is oh so very very helpful if those circuit breakers are labeled. Sadly, all too often, panels are installed with no labels, so it falls to someone else to label them down the road.

The reason they need to be labeled is, well, ok, any competent electrician can usually trace a circuit and identify and kill the breaker. The issue is, what if it’s an emergency? In that case, you have to kill ALL of the power with the main shutoff, and now you may not have any lights.

It’s just a good thing to have them all labeled in case a service guy comes to fix the dishwasher, that way he hopefully won’t charge you extra for the time taken to find the breaker before fixing anything.

Also another note, Belmont and Brookline (local towns here) are now requiring all city-permit-issued electrical work to include mapping/ labeling the panel.

Now in my case here today, one of my regular clients has a big (and I do mean big) old Victorian house, and lately I have been having to go over there at all hours to fix heating issues.  AND . . .  the panel is not labeled, so when I am over there at 2 am trying to shut off power to a burst hot water heater, the lack of any labeling has been getting to be a bit of an annoyance. So I finally talked him into letting me do some panel mapping,

Now for all you intolerant electricians out there, please bear in mind, I have been working with a master electrician for 7 years now and I am a de facto trainee and I already know a lot but even then, I only do basic stuff like the occasional switch swap unless he is standing there supervising.  As he was here.

Okay, to illustrate, here is the panel in my own apartment.

Nice, concise, clean, altho I think it could have been done better.   It’s a nice list but one must first locate the name of the appliance or circuit on the top left list, then look at the chart below it to see how the breakers are numbered / laid out, and then go to the breakers themselves and count up from the bottom to find it.  Wouldn’t it be so much better to just have the appliance name right on or next to the breaker??  This is the kind of thing I am trying to make better.

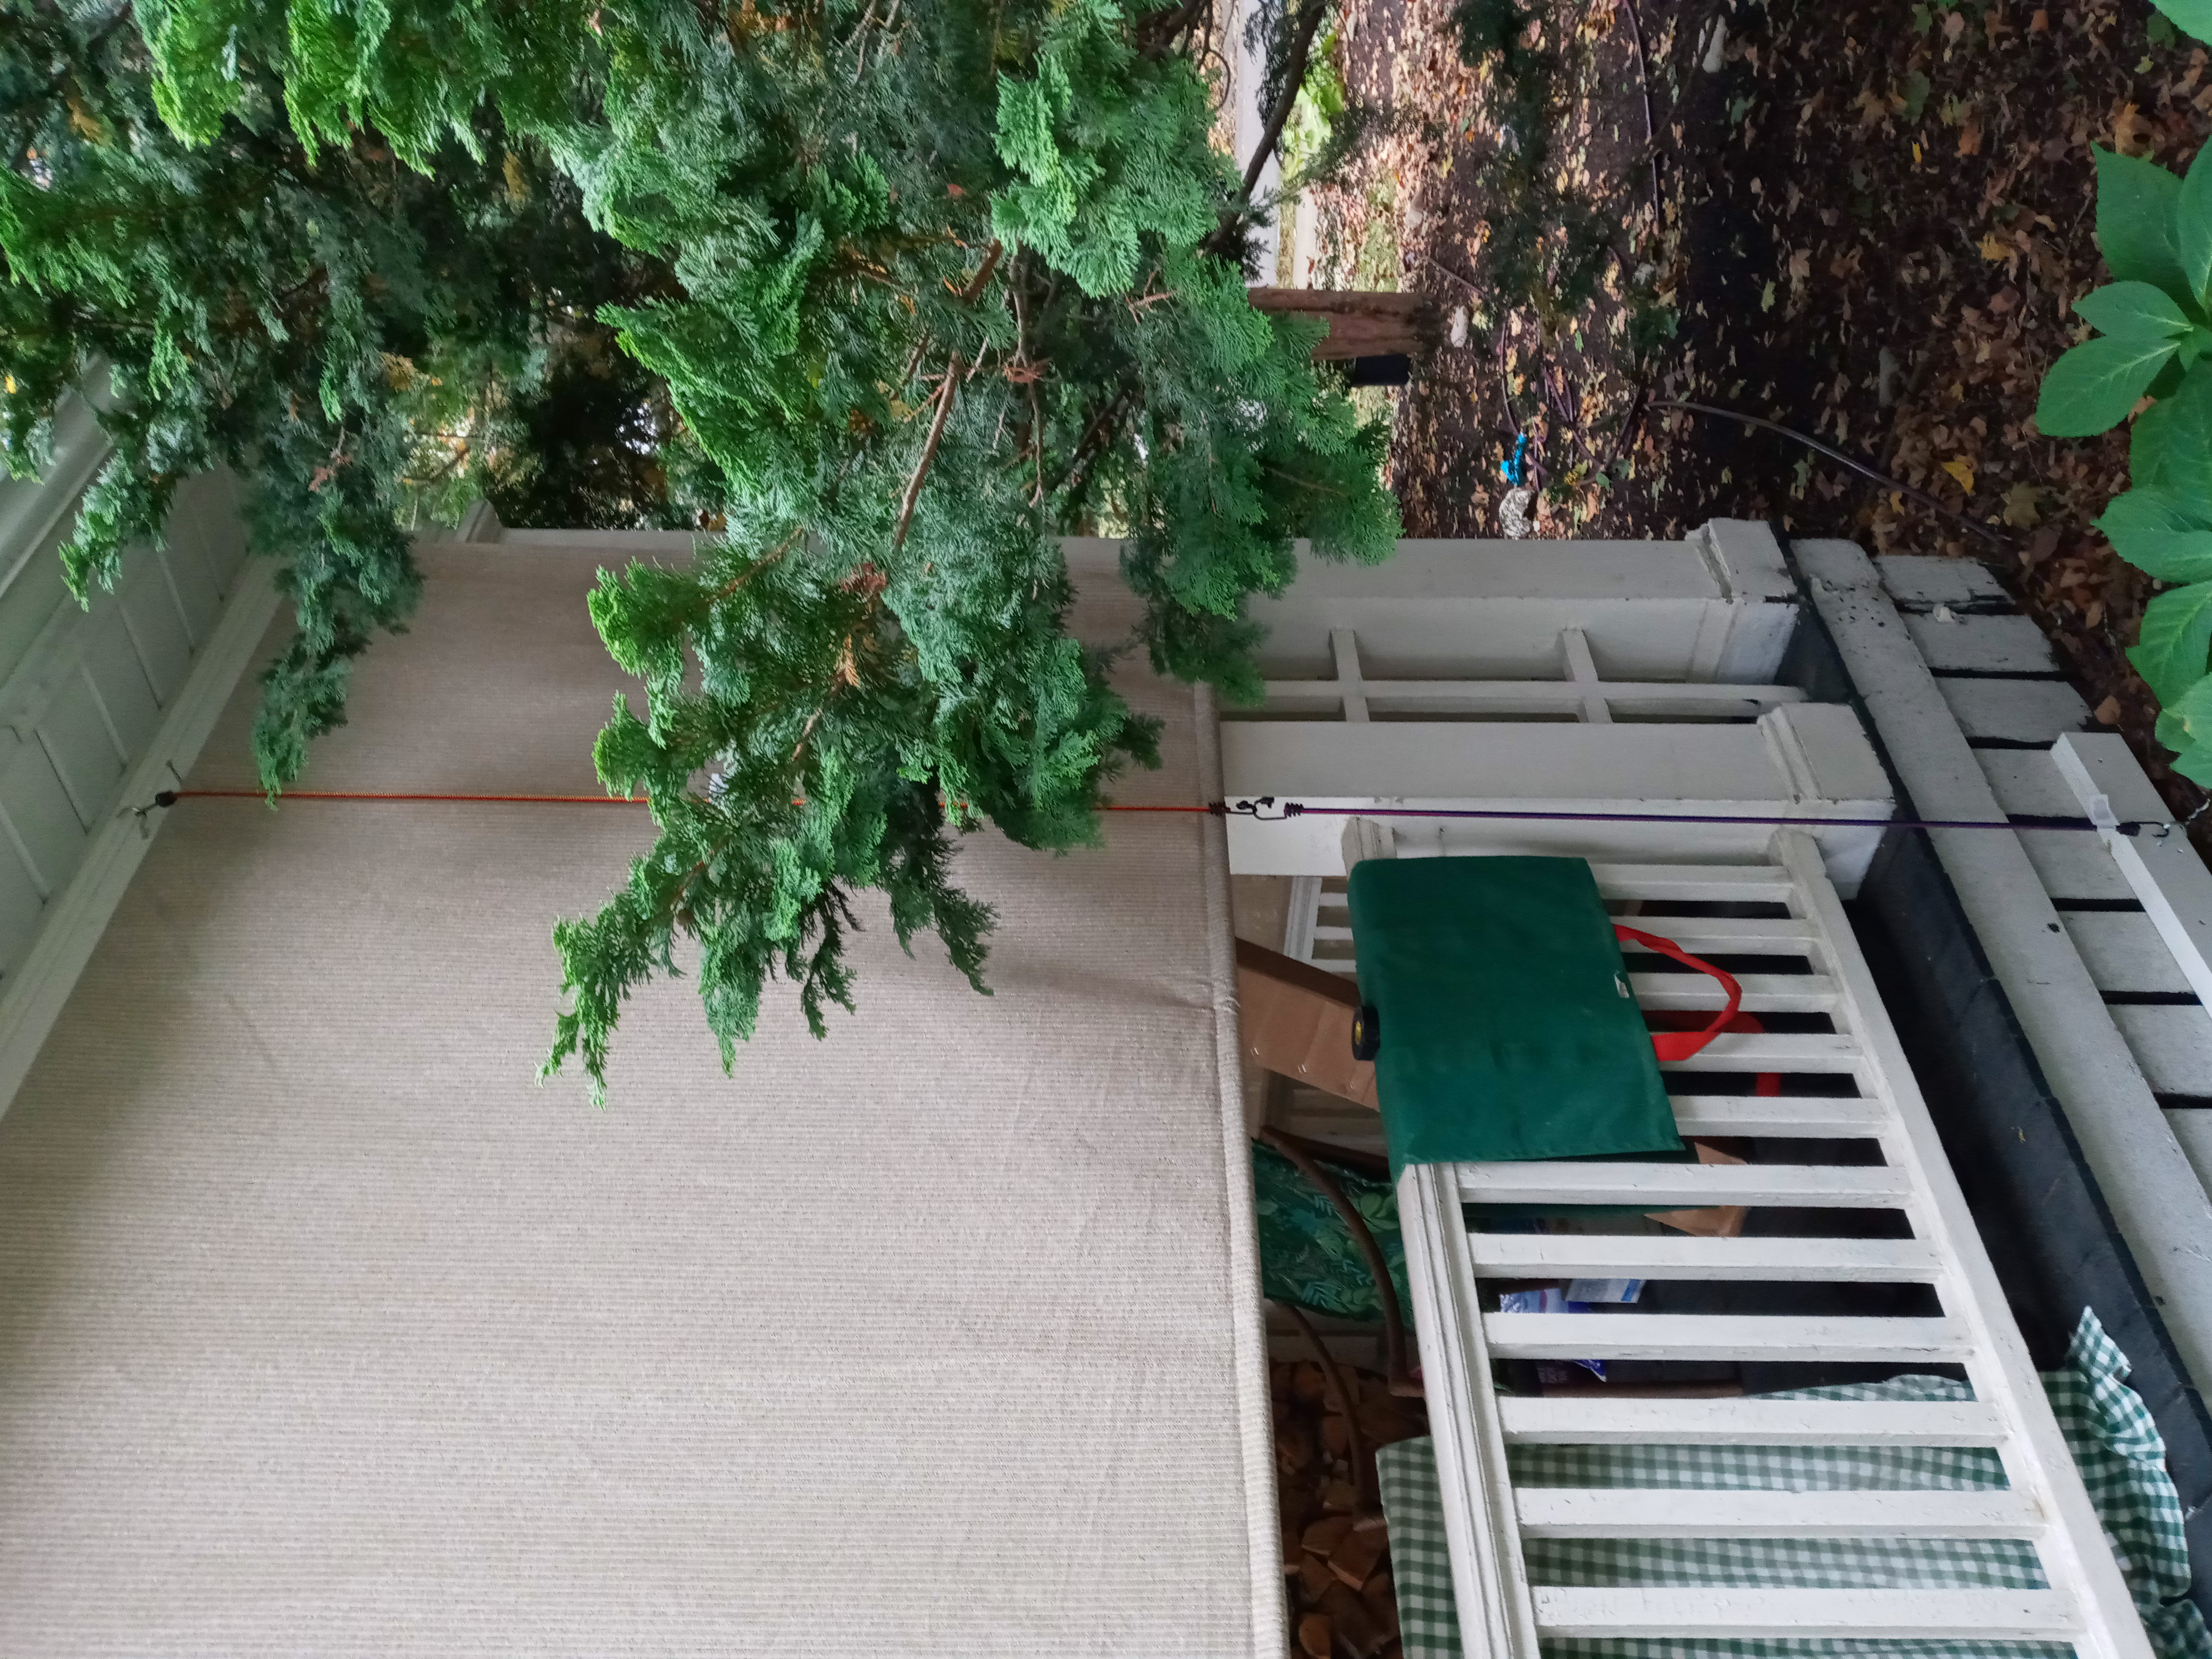
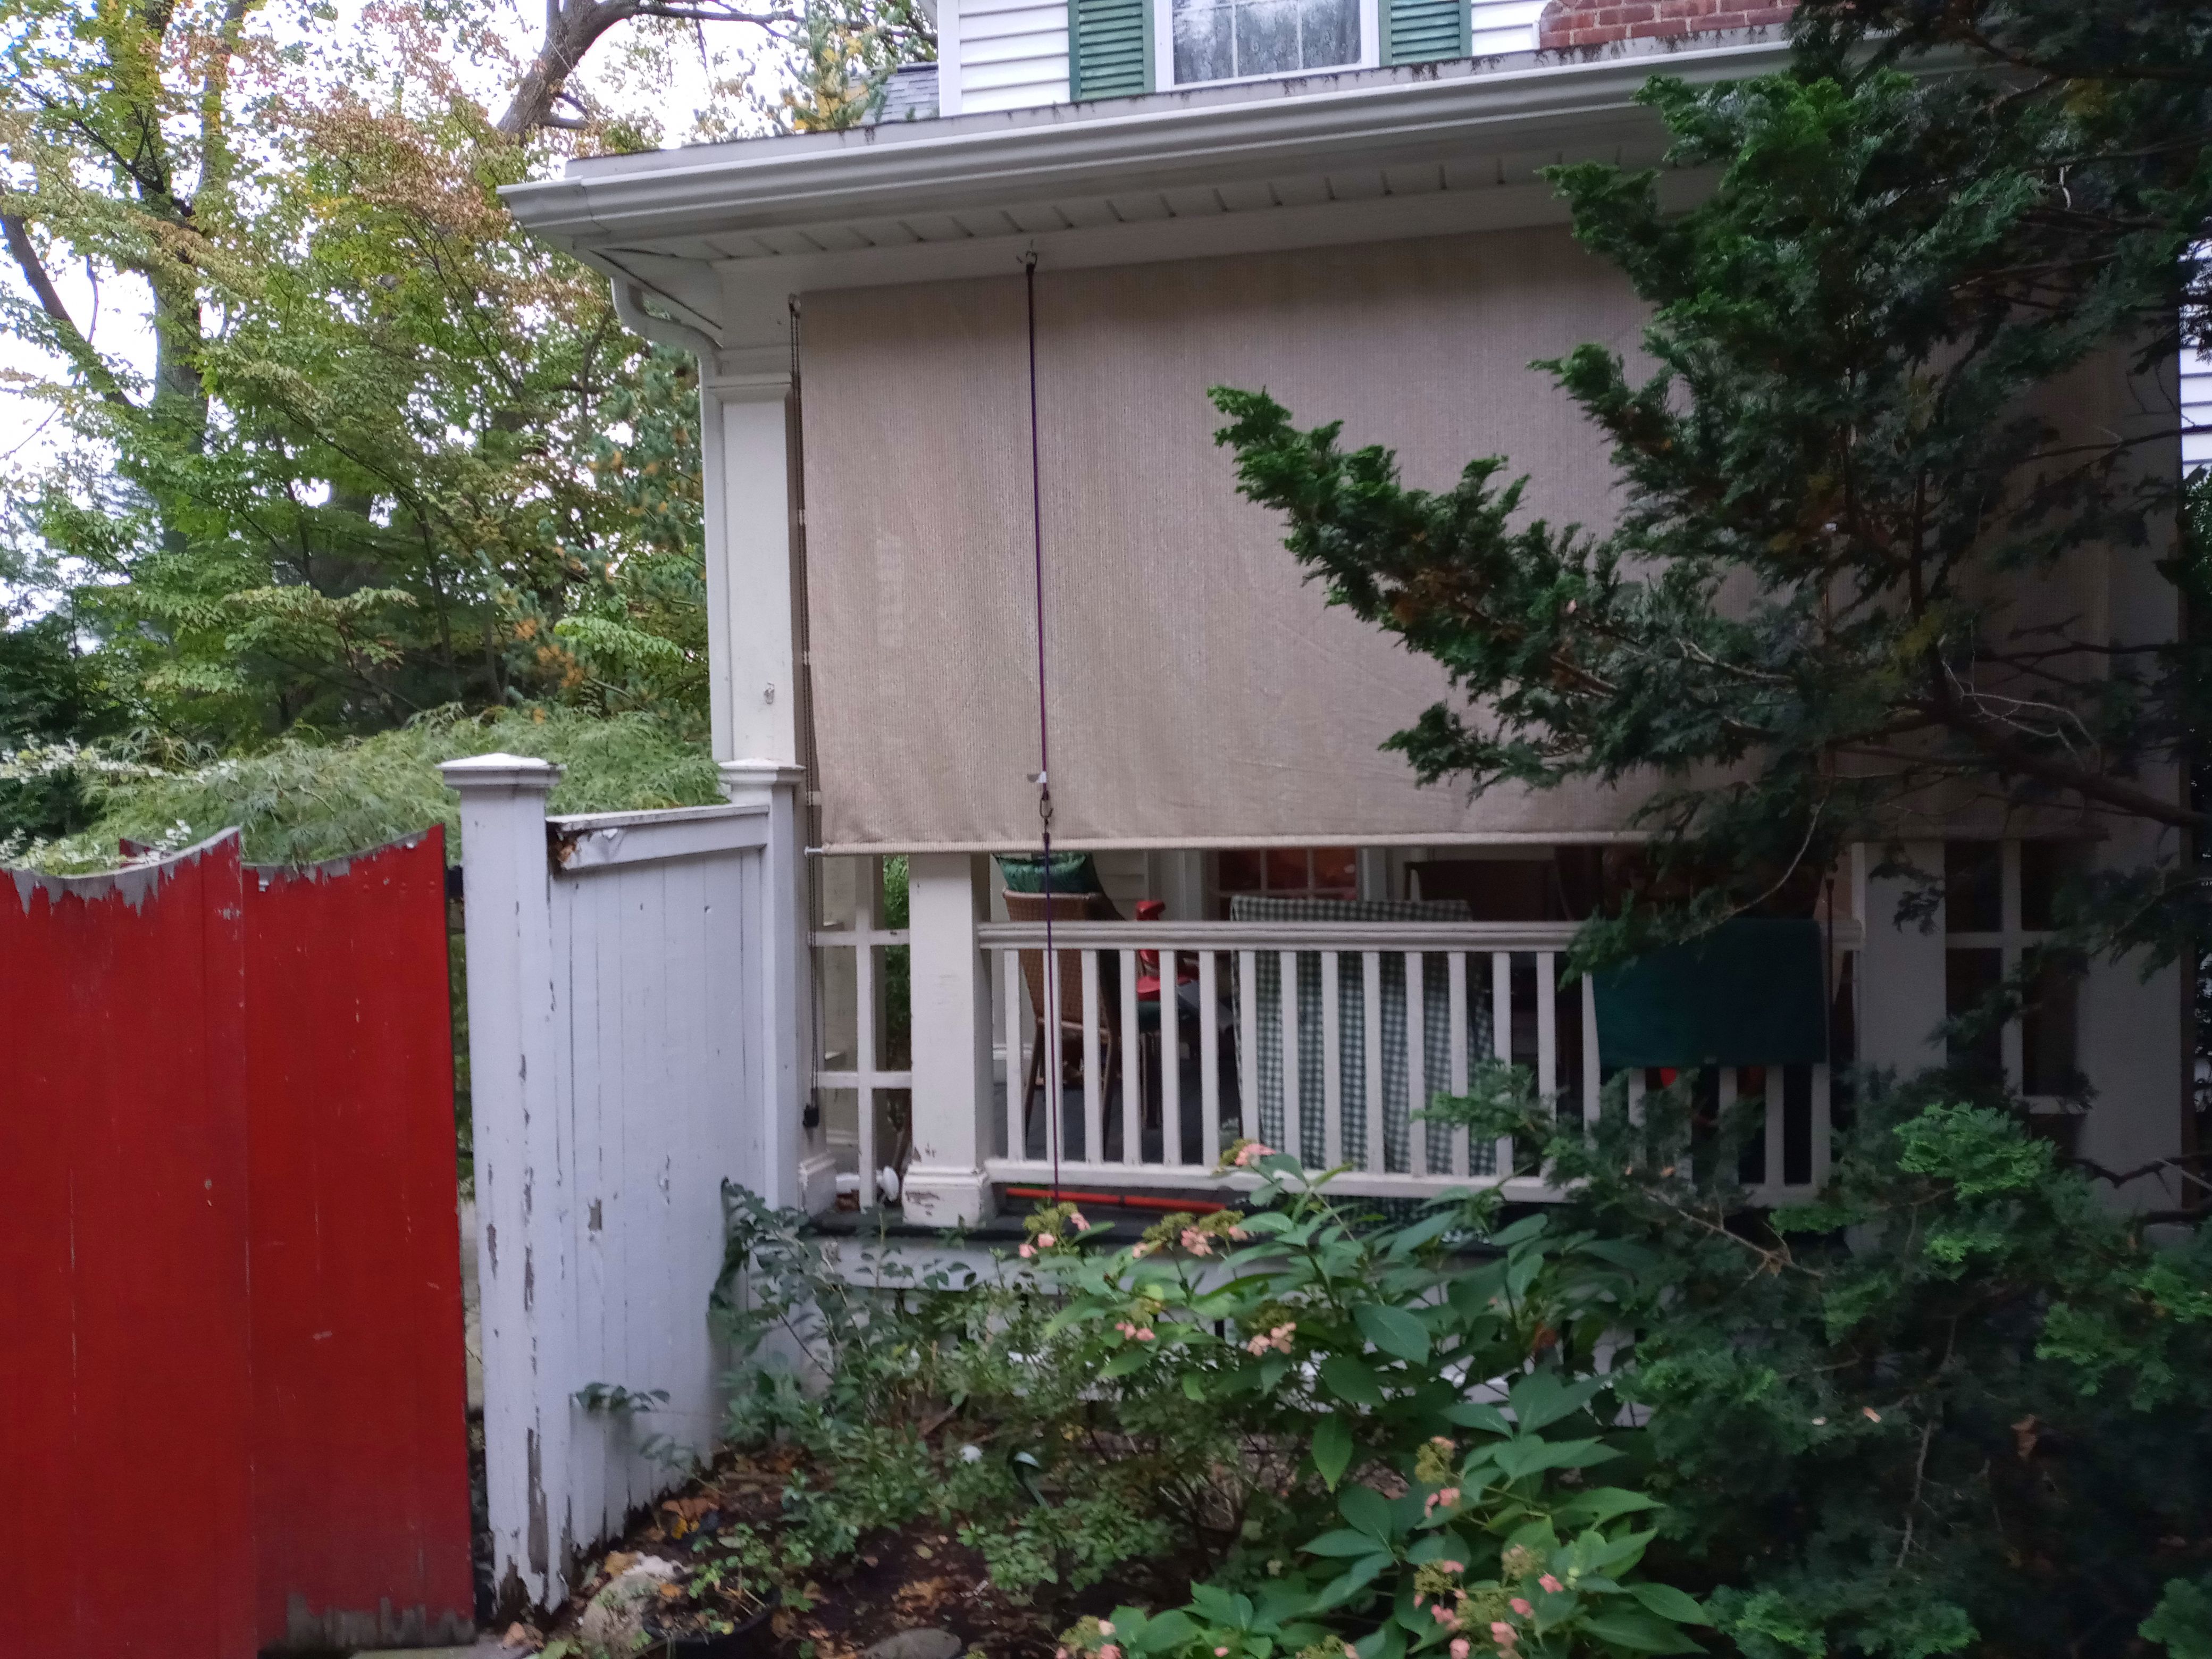
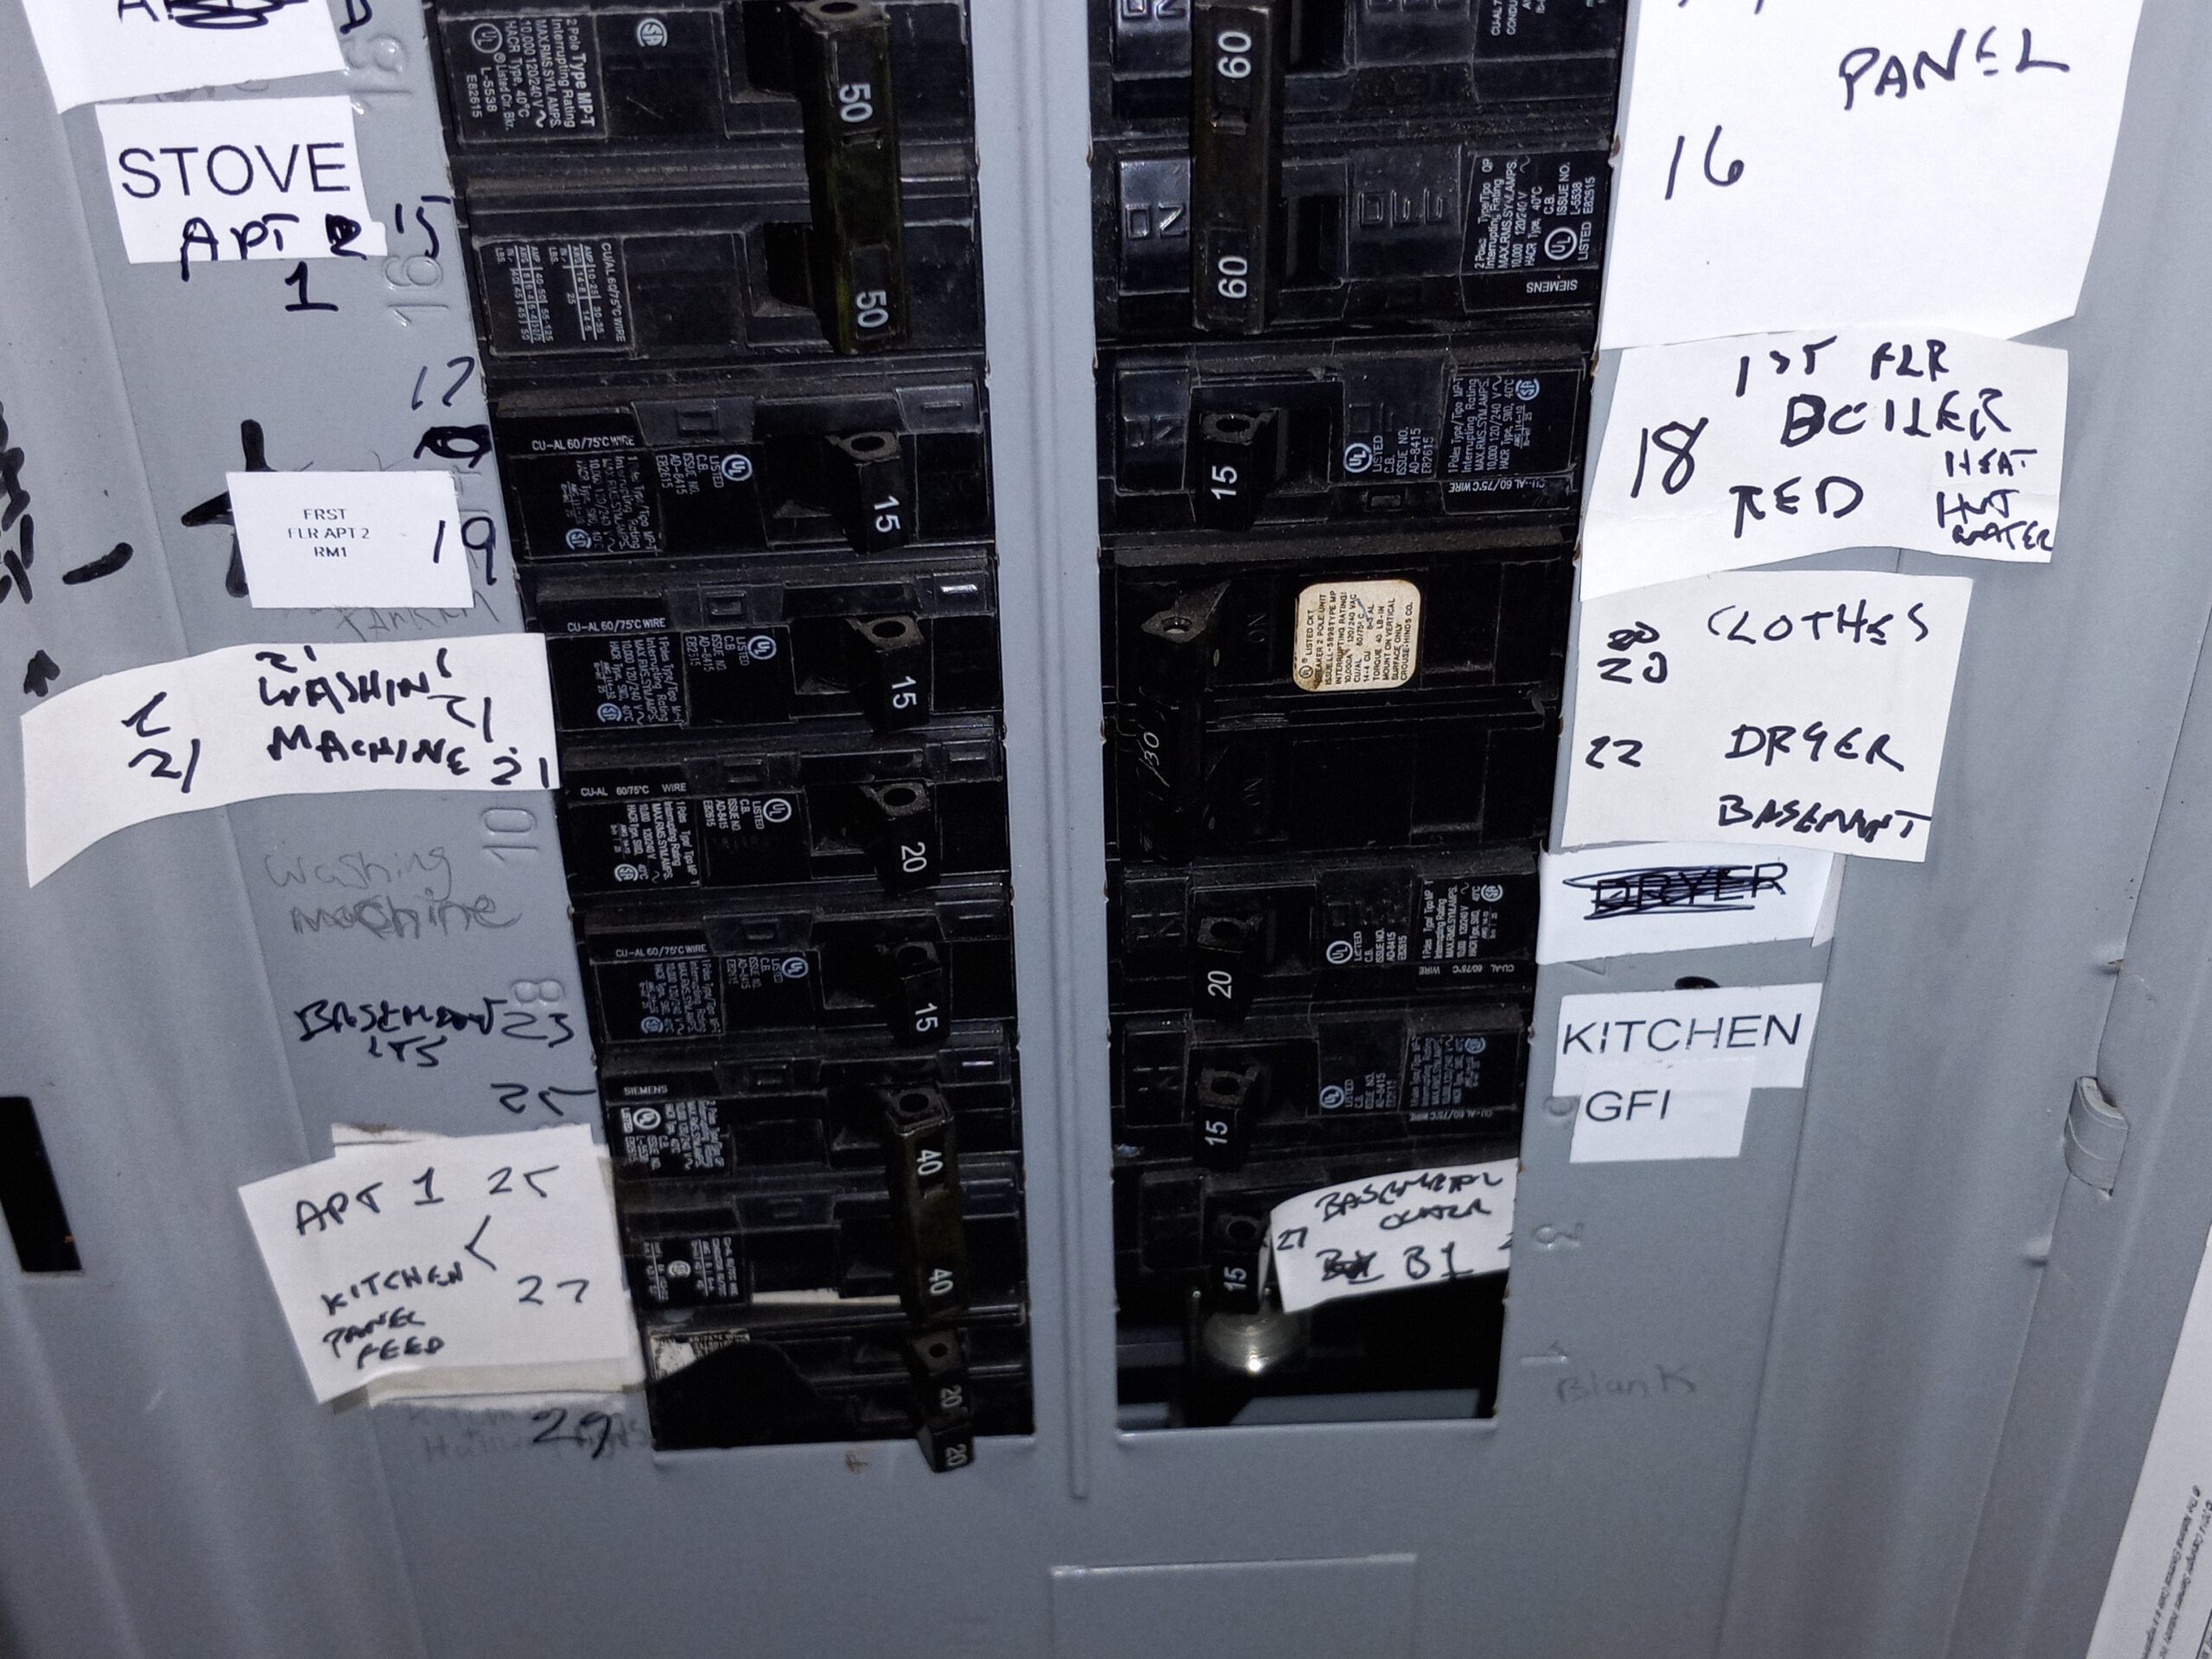
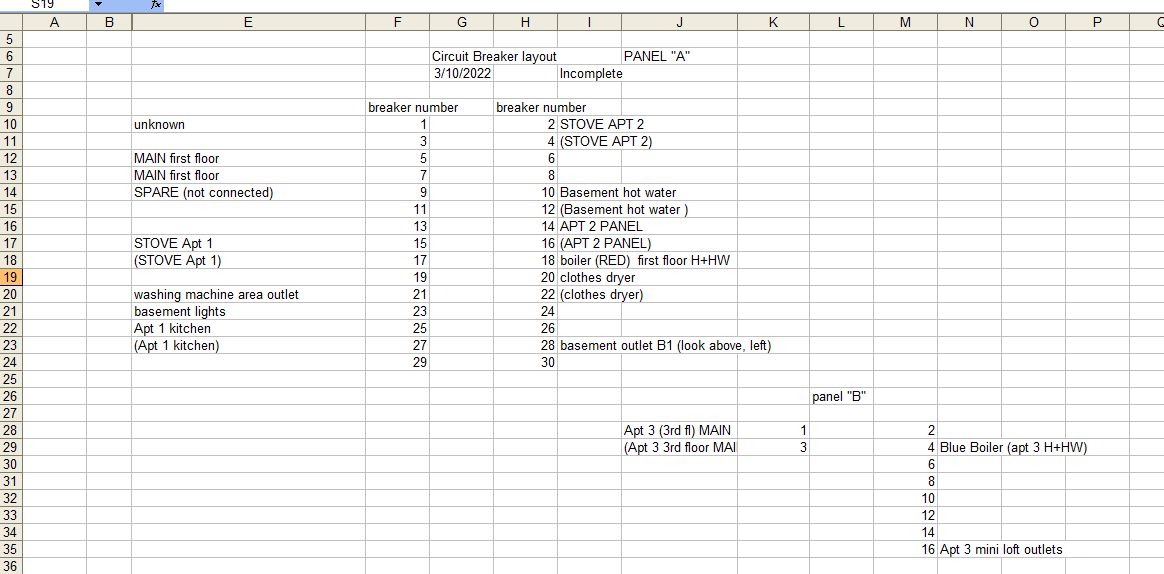
Here is the “before’ shot of the old house panel.

Someone had started to map it but gave up. And the real catalyst here was the marking for “blue boiler” which was NOT connected to the blue boiler. My hair (not pictured) was torn out and on floor. The breaker for that boiler was not even in this panel.

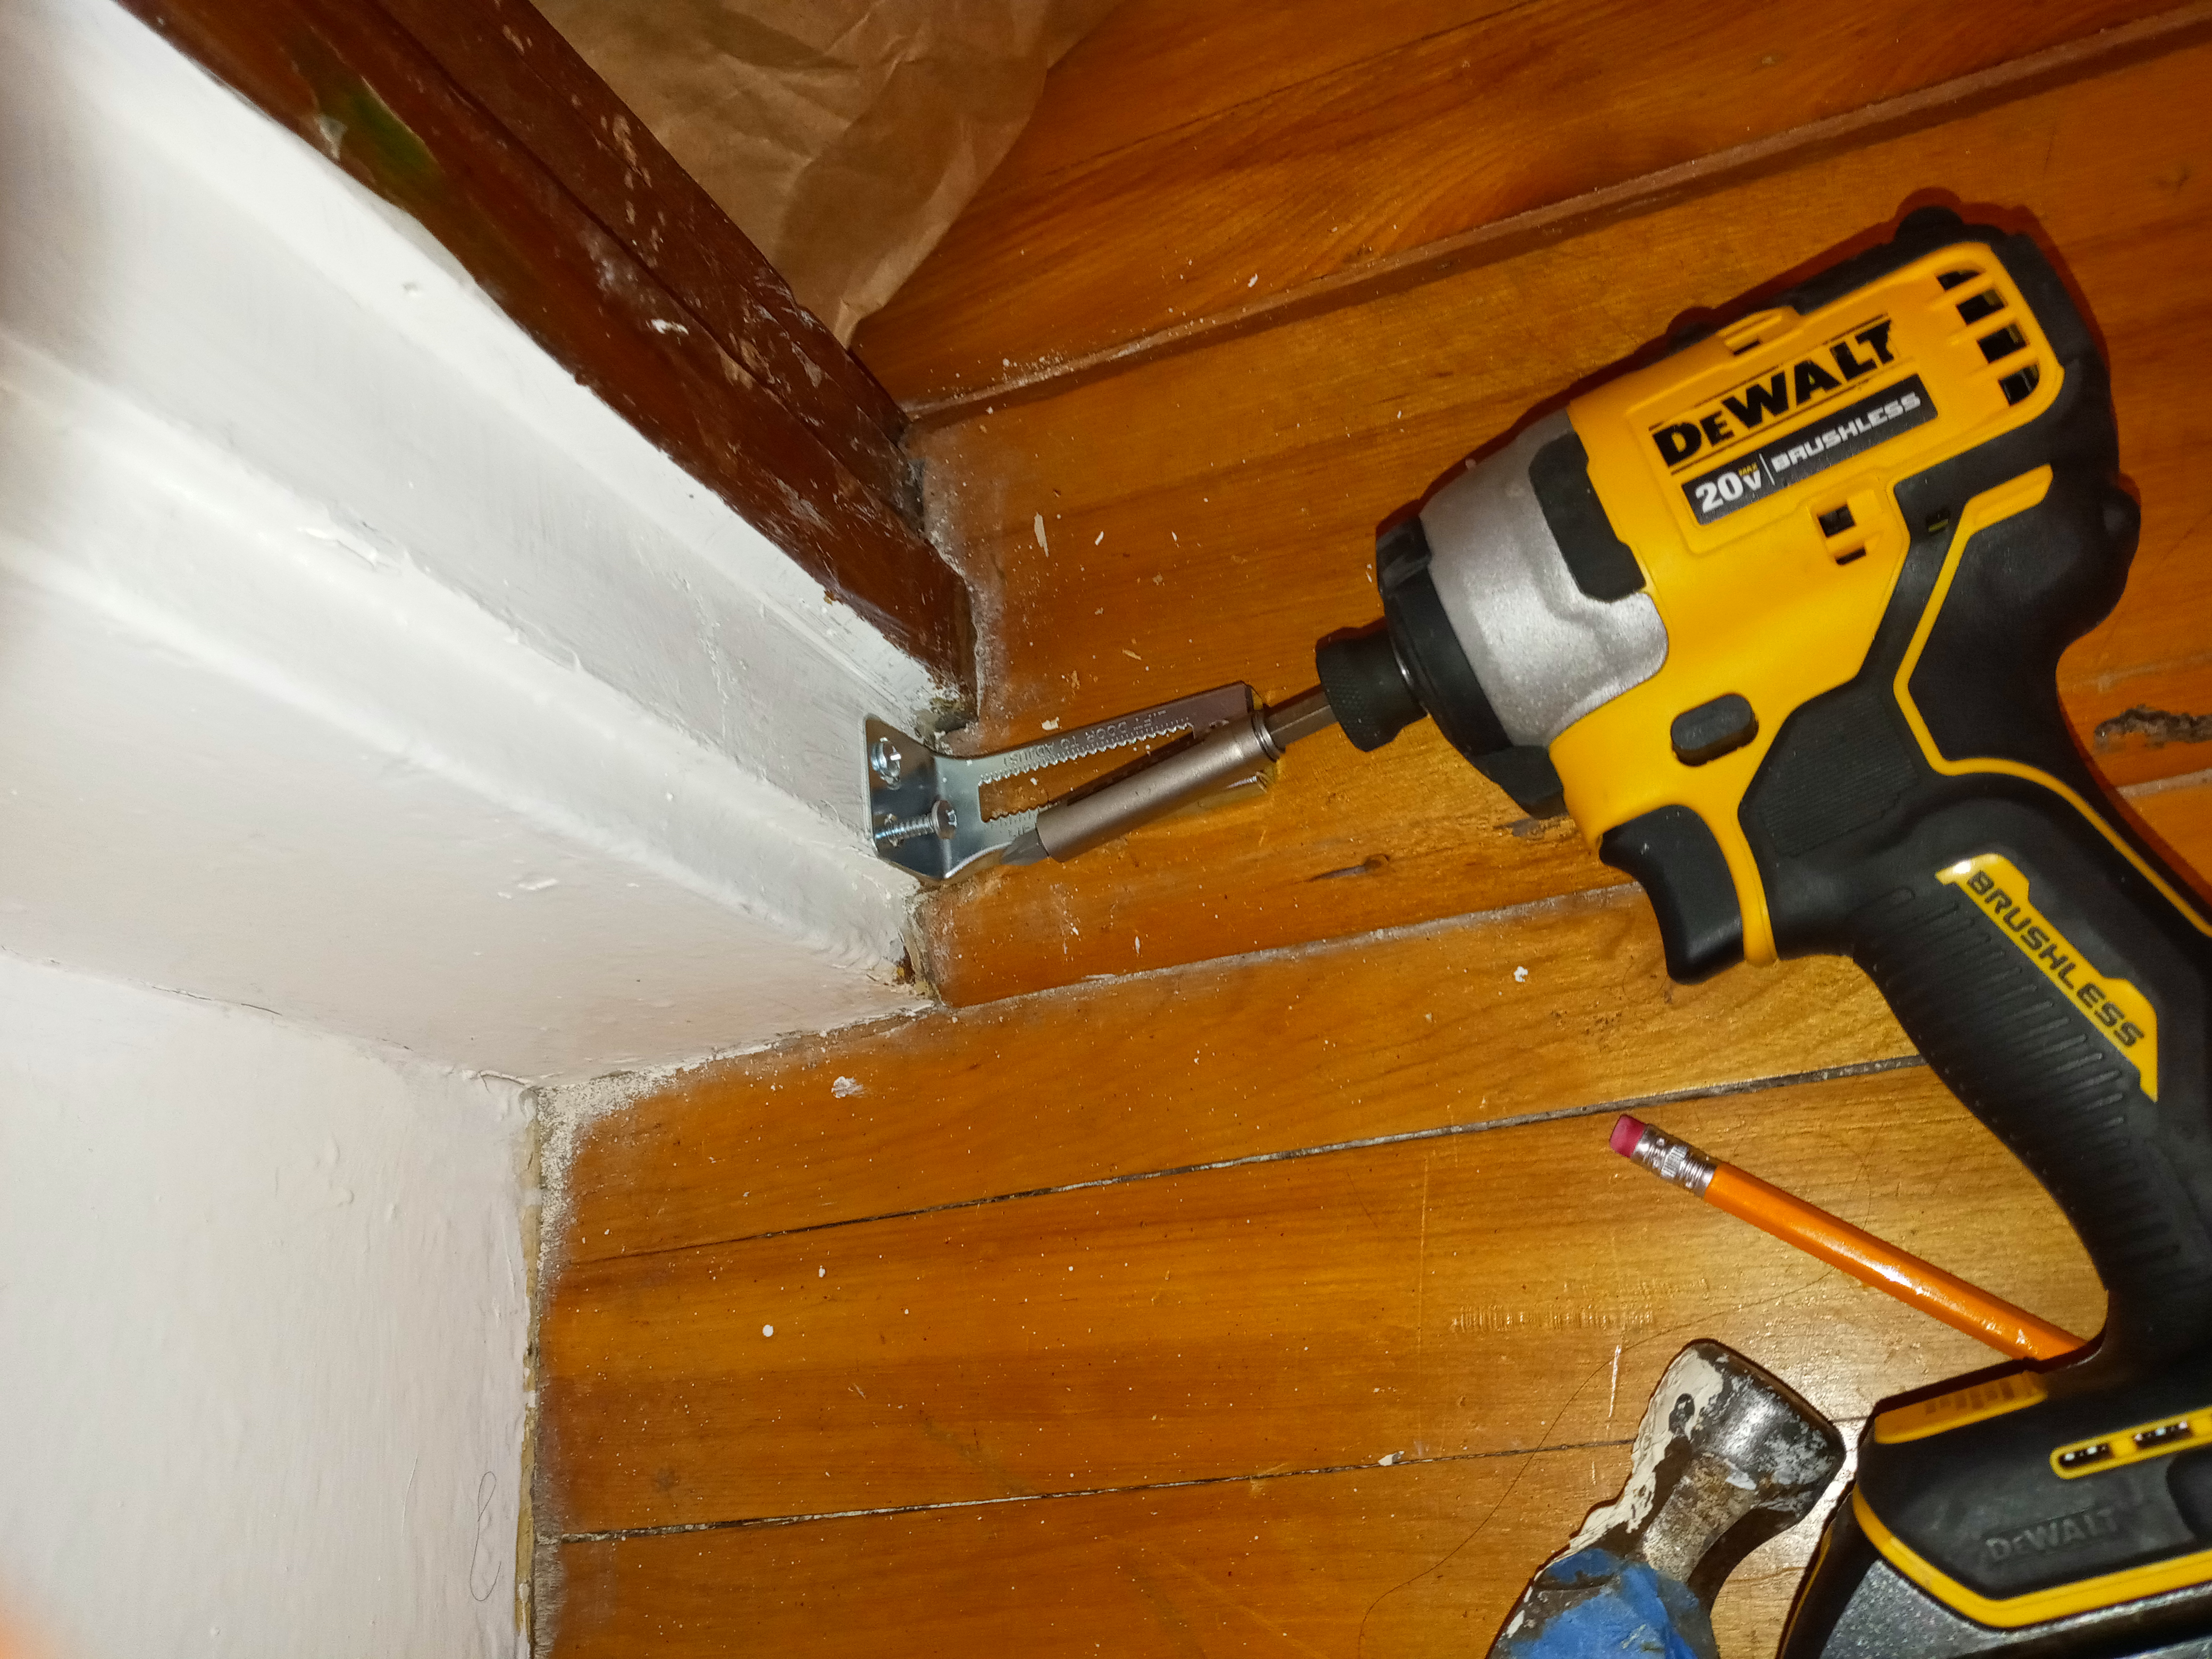
Ok, so here is my nifty little circuit tracer device.

I plug the smaller piece into a receptacle and it sends a signal back to the breaker, and I can detect that signal with the wand portion, and that’s how I can trace the breaker for that circuit.

Here you see the main panel with the cover removed.

As a panel evolves with new circuits added over time, the wires get all over the place and it gets harder to trace the signal so we have to remove the panel to get closer to the actual wire with the wand. Note DO NOT remove your panel cover unless you know what you are doing!!!  Last thing I need is a fricasseed blog reader!!!

We were only tracing the basement circuits, so I would someday be able to kill power to items like boilers and hot water heaters in emergencies. I took some label stock and wrote down notes to stick on the panel. Sloppy, but way better than what I had.

So next, while I will no doubt get chastised by electricians, I also know a “usability expert” (these are people who actually go to college to learn how to make things easier to use) and no doubt I will be hearing from her about what I am doing wrong BUT my plan here is not just to label this one panel, but to label all three panels in the basement, and THEN I plan to post signage on all the basement devices like water heaters etc. to say “power shutoff: Panel A breaker 18″ So even a new service guy will have minimal trouble shutting stuff off as needed. And of course the panels themselves will be named and labeled A, B, and C. And of course I also have to post a legend of where is apt 1, which unit is apt 2, and so one. This was much  more brainwork than I thought it would be!!

So this was the first draft:  Hang on, more to come   

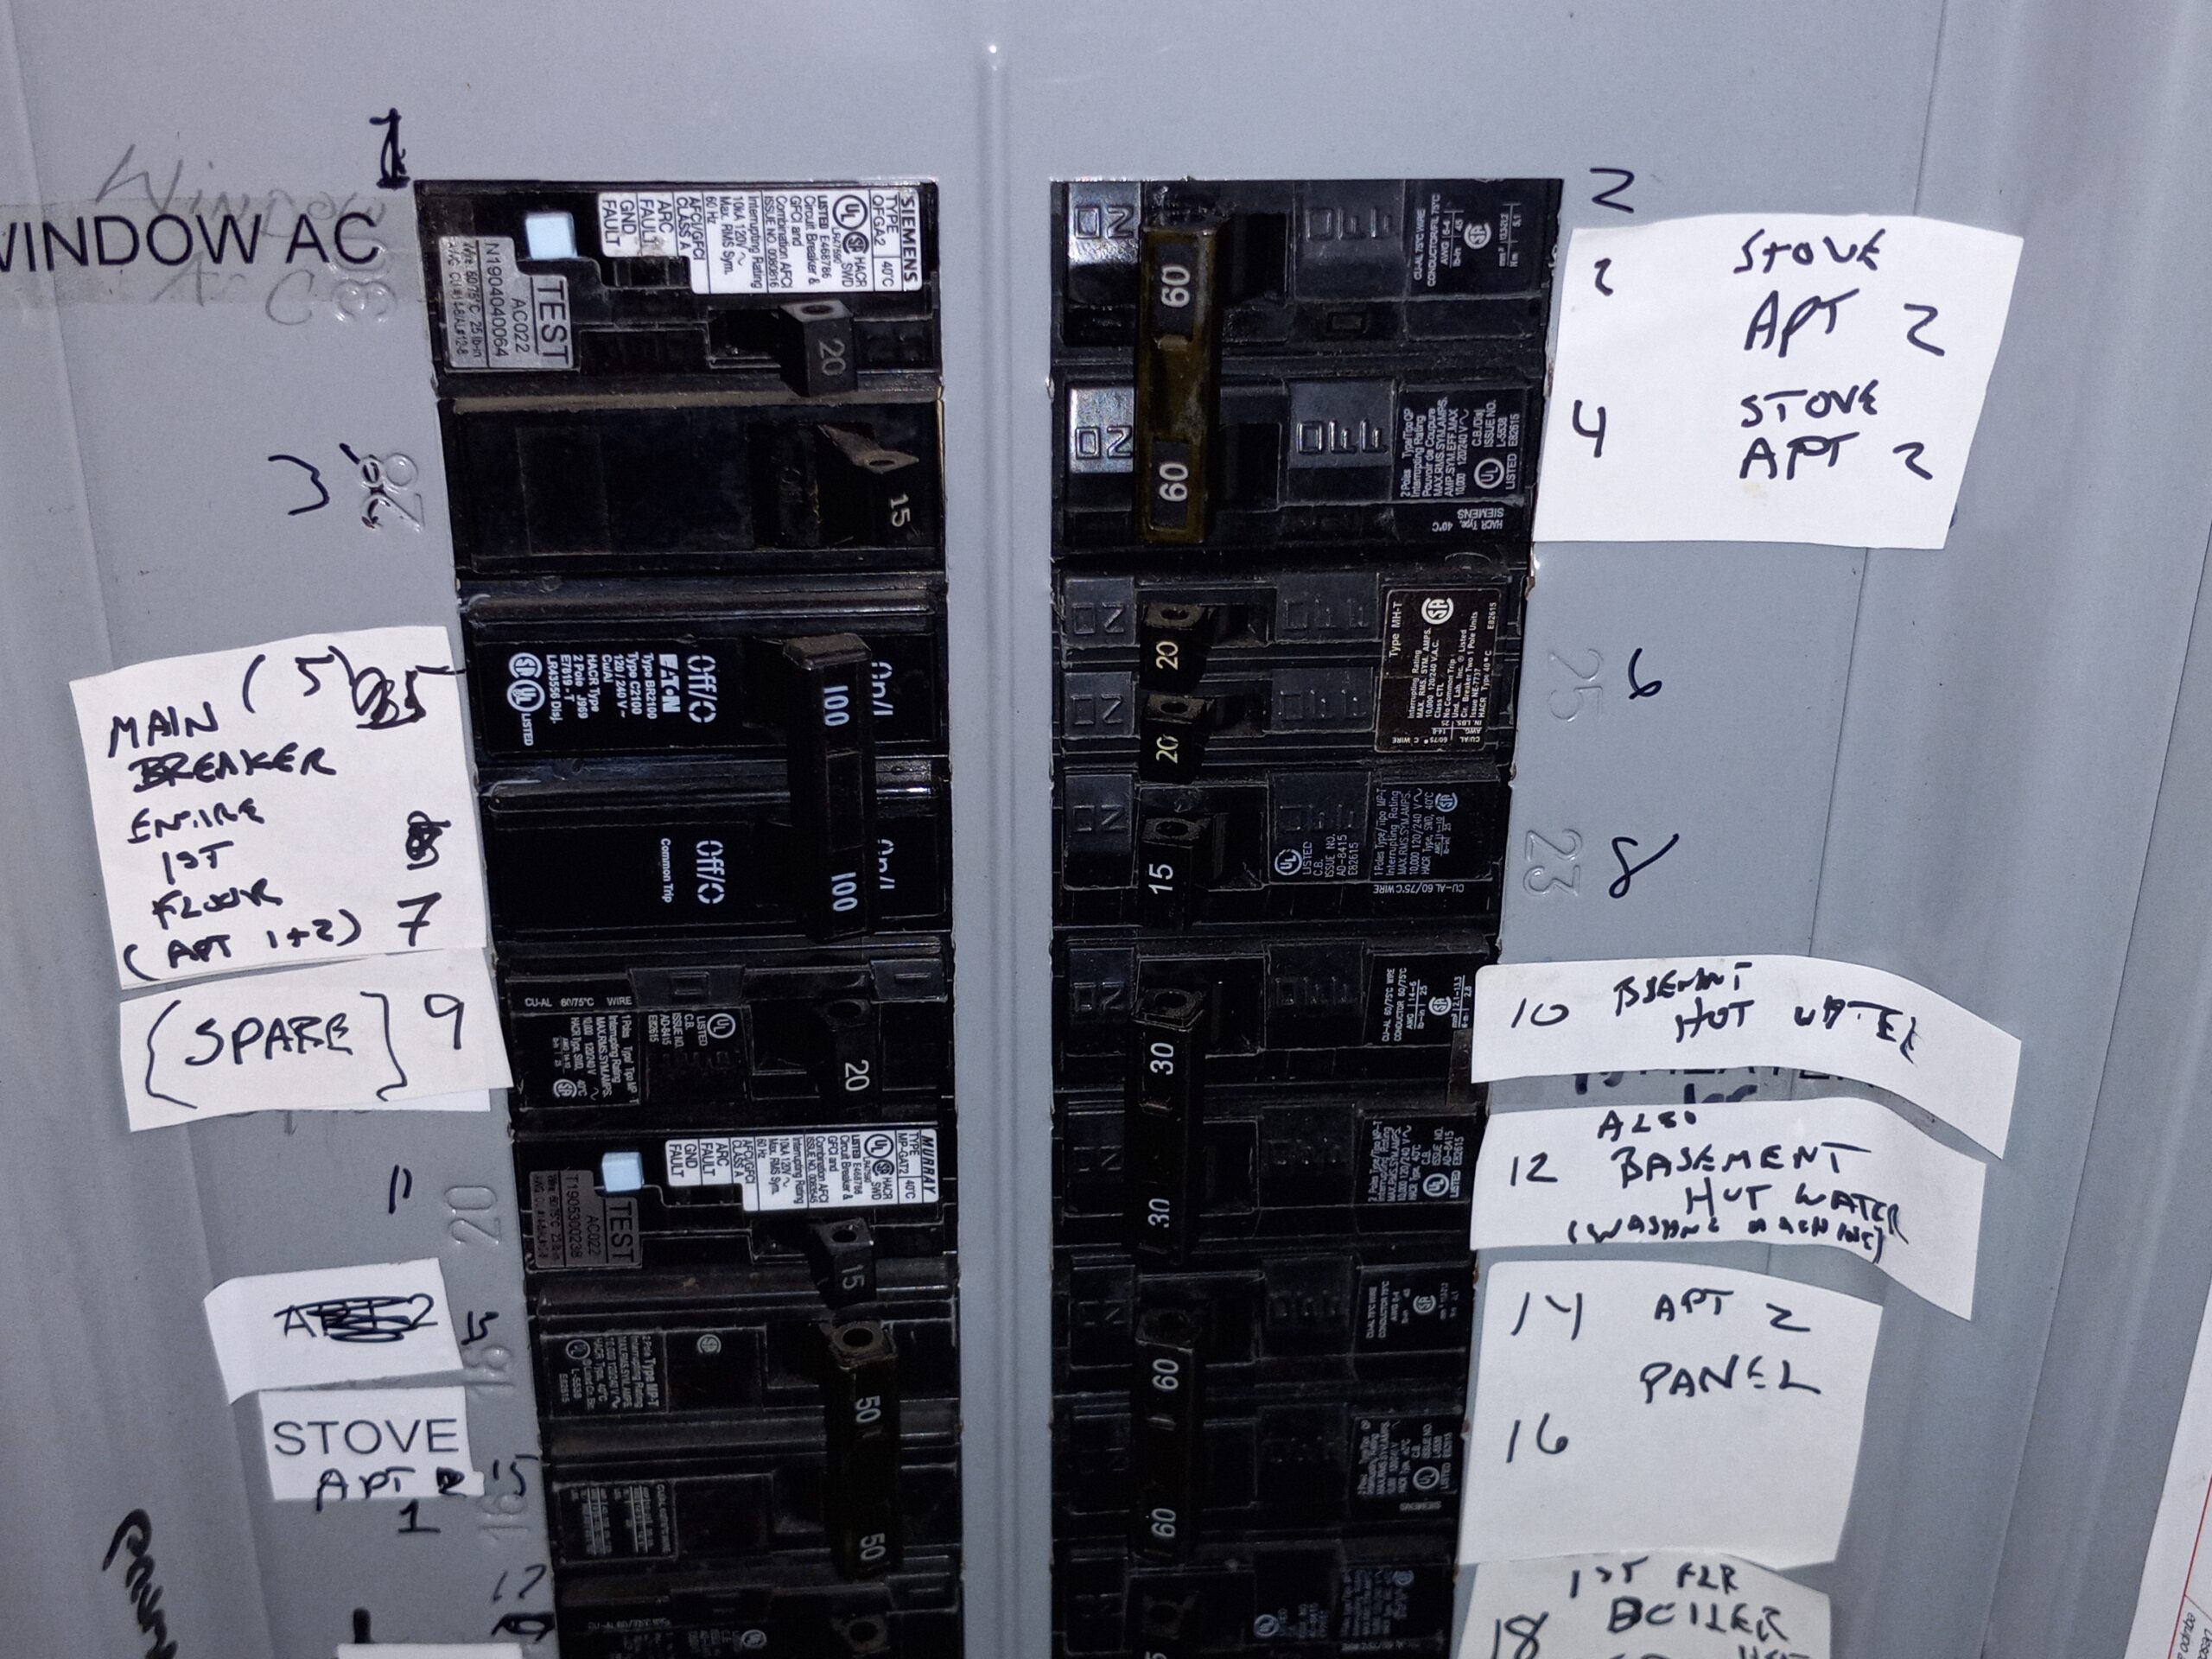
I also posted a printed guide on the insides of the panel door:

And a few days later I printed up some better labels on crack & peel adhesive stock and finally got them in.

Again, it’s not done, and I am still refining my technique, but the key items in the basement (water heaters, boilers, etc.) are finally mapped to their breakers, and someday we will do the rest of the house!

–jl


Installing a Bi-Fold Door

I have tangled with many a poorly installed bi-fold door, but this was the first time someone asked me to install one from scratch.  You don’t often hear me say this, but these kits are very well designed and easy to execute. *** At least I thought so.

First you measure the doorway and buy a  new door that is made for that size, which I guess is a fairly standard set of common sizes.  Here it is half unwrapped:


Next, just 4 or 5 screws  to install the header bracket, centered by eye, no cutting needed:

Then, install a little doodad to hold the bottom hinge pin, 3 screws:

Next, grab the entire door and insert the top hinge pin (which I had stuck into a predrilled hole in the door) in the top header bracket on the left, and then wrestle the bottom hinge pin into the toothed slot in the little bottom bracket, then just stick on the little bolt-thru knob handle, and . . .  VIOLA . Just that simple.  Looks pretty darn good.  Now it just needs a coat of paint to be truly done.

*** Just a little addendum, after I installed the door and tested it multiple times, a week later, in daily client use, the door came off the hinges, ugh.  Turns out there was a manufacturing flaw– the little doodad that holds the top hinge has a hole for a set screw/bolt, and that screw/bolt holds the door in a chosen left-right place, and the hole’s threads were not cut properly– the screw was binding, so even though it felt like it was all the way in, it wasn’t.  Once diagnosed, all I had to do was turn the screw way (way) harder than I normally would.  Normally you don’t want to do that as it risks stripping the threads, but in this case the screw acted as a “tap” and cut new usable threads, and this allowed me to properly place the hinges.  Sigh.  So many products like this are cheaply manufactured, so no matter how careful and precise you are, you must still be vigilant, as there is always a gremlin hiding somewhere!   -jl

Unusual fix on a big porch shade

So this client has a porch and I put in a 10 ft by 10ft shade, he uses it mostly to keep snow off the porch in winter.
Trouble is, when the wind whips up, the shade jumps around and gets folded funny and what not, SO . . .   I came up with a plan to install bungee cords to keep it in place.  Seems so simple but try finding bungee cords when everyone on the planet is tying down everything in storms and the container ships are backed up.  so I screwed in 2 long PVC boards at bottom (had to eyeball everything as nothing was level or symmetrical on this old house)  and put hooks at the top (again, nothing in stock anywhere) and I found just the right length of bungee (well, 2 paired together) to allow the shade to roam a little and move freely up and down.
Works great, and looks terribly elegant.  now we wait for a hurricane.  :-/

Caulking a Tub: Should I Fill it with Water?

Whenever I do a job I always try to look it up on youtube first to see what other people have to say about doing it. Unfortunately, sometimes the information presented on youtube is contradictory. A perfect example of this is, when caulking a tub, should you fill the tub with water so the caulk sets with the tub in a lower position?

I can see the logic in people saying that one should do this. The theory is, tubs can move down a little bit at when they are filled with the weight of the water plus a person taking a bath; so if you fill it with water while the caulk is setting, the caulk will stretch out a little bit, and thus will not crack or detach when the tub is filled with water down the road.

I got curious, so I looked into this a little further.

What I found out was, first of all, GE, which makes the caulking I use, has nothing to say on the subject. I called up their consumer tech support and asked if I should I fill the tub with water, and they said, “we don’t have anything to say about that.” So I guess they don’t think you need to do it.

Second, Tommy on this old House doesn’t say anything about filling the tub with water. I know he is not omniscient, but he does know an awful lot.

And finally, I have caulked tubs several times, sometimes filling tub with water and some sometimes not (oops, I forgot), and I have found that it makes no difference that I can see.

One also has to consider, if you do manage to lower the tub by an eighth of an inch, or by whatever bit of play exists in the mounting of the tub, once you remove the weight of the water, you now have whatever tension pressure existing in the tub support now exerting that pressure upwards on the bottom course of all the wall tiles.  I’m not sure that is such a good idea.  Caulk can stretch when pulled but i don’t think it will compress as easily when pushed.

I can see how maybe some tile jobs had problems that led to this conventional wisdom of filling a caulked tub with water. If you use anything less than high-end caulking, it’s bound to crack and/or come loose. And if you don’t prep the surface properly, meaning you did not get it clean, clean, clean, any slight movement of the tub will cause the caulking to detach.

Also a side note, I occasionally get silicone caulking on my clothes. I am thoroughly amazed at just how pliable and elastic this stuff is once it is fully cured.  The whole idea of using silicone caulking is, it is highly flexible, and able to withstand any shifting in the planes of a bathroom wall.

Now granted I have not done a full-on mythbusters test of 10 to 12 tubs made of different materials. So I can’t claim this is definitive or truly scientific. But I cannot see a clear reason to bother with filling a tub with water when caulking.

Also, if the caulking were to crack or come loose, you can always do it over again. But if you push the tiles up away from the wall, you are now into a much higher level of difficulty of fix.

In sum, I would not bother filling a tub with water when caulking. It’s an intriguing idea but I am not seeing any empirical data to support it, and the upward pressure on the tiles strikes me as a pretty good reason to not do it.

– JL

The Art of the Caulking Job

Every once in a while I get asked to fix the caulk on a sink.  All too often the old sink looks all gunkified, like this:

and, from further away:Such an insult to the spirit.  Anyway, after an hour of cleaning out the old gunk with brushes and a jackknife, and re caulking with the right pure silicone product, we get this:

I have to say, there is a very high degree of artistic satisfaction to be derived from this kind of work.  Yes, the caulk is functional, but after getting it nice and concave and even all around, you also get a rush of aesthetic pleasure when it’s done right.     And there is also the sense of achievement in overcoming the difficulty of working with 100% silicone.  It is VERY sticky and VERY unforgiving and one has only 90 seconds to do the final “tooling” (shaping) before it becomes too hard to work with.

This sink came out great and yes, I feel pretty smug about it 🙂

Assembly Literature

As a handyman I am often asked to assemble things, everything from armoires to chairs to bicycles. As a result, I have to suffer thru assembly instructions, many of which are simply godawful.

I have to ask . . . WHY? Why is it that these instructions are almost always done so poorly? Why interact so sparsely and ineffectively with a recent customer? Why not use this opportunity to reinforce the purchase decision and cultivate your relationship? Why demonstrate incompetence and lack of concern for your customer at this most critical juncture?

Before I became a handyman I was very much involved mass communications, everything from TV to publishing to speaking. I realize no one will ever read this, but for my own sanity, here is a basic guide to creating useful assembly instructions:

1) Be aware of your customer’s point of view. They may not have the same technical background as yourself, so it’s helpful to make an effort to establish common language. For example, I just installed a Defiant brand keyless deadbolt. At one point, the instructions read “make sure the plug is facing OUT.

OUT? Does that mean OUT as in facing me, or OUT as in facing the exterior of the house? Very important to reduce ambiguity. Other people may not know what you mean when you use a certain word. Like OUT. It is not a sin to repeat the instruction in a different phraseology. Like, facing it toward YOU Or facing the EXTERIOR.

2) Warn about likely common errors. i.e., “As you do this next step, be careful to not do X.”  Knowledge of what ways are wrong and what to avoide is called EXPERIENCE.  Share it.

3) Avoid using somewhat technical words like “Flange.” Any word describing a piece of the thing, like “strut” or “housing,” well, you the technical writer may know these words but the reader may not. Always better to say “doodad” and then describe it.

As I mentioned, I just installed a Defiant keyless deadbolt. Once I got the thing all installed, the thumb turn (the thing that lets you turn the lock on the inside of the door) [see how I did not assume you know what a thumb turn is???] would not turn past 2 o’clock. I assumed the whole thing was busted but when I called the help line they said “even tho it seems to be totally broken, it is fine, just install it and enter the code to let it reset itself.

Great news, but since this a common problem, WHY IS THIS LIKELY GLITCH NOT MENTIONED IN THE INSTRUCTIONS?

I was also admonished by the help person to not tighten the machine screws too tight. Great. I appreciate that, but WHY IS THIS NOT MENTIONED IN THE INSTRUCTIONS?

I am sorry to dump on Defiant so much, they were just the latest assembly instructions I had to suffer thru. The phone help was actually great.

I did an Ancheer bike a few weeks ago and that was the WORST assembly kit ever.

As I sit here ranting, asking why things are not done a better way, I actually know the answer. I call it corporate stage fright. These minimalist instructions are a result of a need to hide and conceal one’s own humanity. It’s a fear of being laughed at. It’s a form of shame energy, which, if not managed and processed, results in creating what is essentially a test that you, dear reader, will fail.

I have to mention, one of the great benefits of arts education is to bring one out of that stage-fright-ridden shame state, and lose one’s terror of being seen as a flawed human being.

There is no excuse for any of the companies, as I am sitting right here. Send me the kit (well, two of them so I can do pix of unassembled and assembled) and I will put it all together for you.

JL

Caveat Emptor: Portable Air conditioners, aka Swamp Coolers

So I got an advertisement in my inbox to day that was so very misleading I felt compelled to write this post.  It has to do with these little boxes being marketed as portable air conditioners.  This is reminiscent of that device that claimed to be able to see thru walls.

There is a video on youtube that explains it way better than I can

Now to be fair, these units actually DO work . . . kinda sorta.  but they cool the same as any humidifier.  The science is, when water evaporates it takes some heat with it . . .  but not all that much, and if the air is already high humidity, no water will be removed by evaporation, hence, no heat will be removed.

It amazes me that this kind of thing can be marketed legally, making such outrageous claims.  Don’t be a sucker.

Main thing you can do to keep cooler is to CLEAN THE AIR FILTER in your regular real AC units.  – JL

Struggling with McMansions

Many years ago I had a visit from my brother who had recently redone his kitchen.  He had done most of the work himself (he also put a 2nd floor on his house) and I confess I had gotten pretty tired of his constant talking about the minutiae of all his adventures in home building.   So to shut him up I drove him down to the Breakers in Rhode Island.

If you have never seen it, it is a mansion built in the era when the 1% had an even a bigger piece of the pie and were not afraid to spend it.   On the tour, the guide took us to the library, which is an entire room built like a leather bound book.  The guide said, “if this room were to be built today, it would cost well over $100,000.”  My brother immediately said, “You couldn’t build this room today at any price.  The craftspeople who built this room don’t exist any more.”

I think there is something to this.  I occasionally get called to work on  relatively new houses, often big ones, which I like to call “McMansions.”   And what I have learned is, while they look great from the road, when you get into the house, the bits and pieces, like the toilet paper holders, the towel racks, the locks and latches . . .  all seem to be lacking.  The hardware in the doors and windows is just . . . chintzy.  And the installations are often sub par as well.

Today I replaced a toilet paper holder and a couple of towel racks in a McMansion.  The thing about towel racks and toilet paper holders is, they are destined to get stressed.  So they can’t just be hung like a framed picture.  They needed to be really solidly attached with proper achors in the drywall.  But these items in this house were just attached with the bare minimum.  One towel rack was attached with just a screw into drywall, not even a plastic anchor.   It wasn’t even close to level either.  You know, we’re talking a 2-3 million dollar house.  And yet this is what you get sometimes.

I see other disasters in McMansions and new construction generally– one shower I saw, the grout had not been mixed properly and it was all eroding away, after just 3 years of use.  (Proper grout lasts forever.)  And don’t get me started on 3-year-old shower enclosures that are leaking here there and everywhere.

I have actually gotten to the point where I dread working on new construction homes.  Old houses from 1920, they have real dignity and self respect.  Most of the hardware still works.  The wood is hard as steel.  It feels like it’s worth fixing.


Super Multi-Tasking

It’s not that I am complaining, nor am I saying my work is harder than anyone else’s, but there is one aspect of handyman work that I find to be increasingly taxing, and that is . . .   multitasking.

Back when I was a union musician, we had a system where you got paid 50% extra over scale for “doubling” on a second instrument.  For example, when the flute players all stand up and play their piccolos at the end of “Stars and Stripes Forever,” they are, in, in musician parlance, “doubling.”  They only do it for 16 bars but they get 50% more money than everyone else, for the whole show.  Other examples, a tuba player will double on baritone horn, or an oboe player will double on english horn.

Handyman work has a lot of doubling in it, but it’s different, it’s more like playing the Brahms Violin Concerto and then running over to play tuba in Pictures at an Exhibition– or running across the street to operate a forklift.   Sounds simple enough on paper but it requires an entirely different mindset.

And then there is a whole lot of production/project management.

For example, on a recent job I had to paint a water damaged ceiling  over a tub.  Ok, I need a ladder, I need a dropcloth, the painting pole, a roller (which depth of roller nap to buy??), a can  of stain blocker . . .  THEN, once done with that, I had to swap out a light fixture, and for that, ok, need a ladder, but I also need the new fixture, my multimeter, my voltage detector, my circuit tracer . . .  flute players are switching to another instrument that’s almost identical, just smaller, while I am having to enter entirely new dimensions.  AND they get more money.

I also call this working in multimedia.  It is a major grinding of mental gears.

I envy electricians because all they do all day is deal with electrical stuff.  Their work is challenging but at least they don’t have the distraction of suddenly working on a broken window, a broken deadbolt, a bad downspout, or a stuck drawer in an antique dental cabinet.  I know how to do many things, but that knowledge is all stored on a hard drive in my brain and it takes a little time to call it up to random access memory.

Just one more challenge.  Keeps the competition away anyway.


Caveat YouTube

I confess, for a handyman like me, YouTube has been a godsend.  I think it’s fair to say I have watched over 3,000 YouTube videos of folks showing me how to do this or that.

However, since I got into this work by working with an electrician, I have worries about all the non-electricians who are posting videos on how to work with wires.

Even though I have studied electrical for six years, and I could at this point wire a house if I were to build one, I still don’t like to do electrical work for clients.  I mean, I will diagnose, but again, there are just too many variables for me to mess around with it and risk someone else’s house.

Here’s the thing, if I open up a box and everything looks kosher, ok, I MIGHT swap out a switch for a dimmer, or replace a cracked receptacle.  But this is ASSUMING that the box and all the wiring upstream going to panel is fully proper and kosher and nothing strange is going on.  And even then . . .

The problem with wiring is that you can’t know who worked on it before you.  And that’s where the YouTube videos made by non-electricians make me crazy.  There are so many things that can be done wrong by amateurs.  These YouTube videos are often made by DIY’ers who are sharing their own home-grown intuitive approach.  One guy showed how he tested to see if an outlet was energized by plugging in a table lamp.  Ok, in a perfect world, that might work.  But what if the lamp is not coming on because because of a loose neutral wire?  (That means the “hot” wire is still energized.  YIKES.)  What if it’s a “half hot” outlet and the bottom half of the receptacle is still energized?  YEESH.  And there is so much more to look out for . . . the polarity might be reversed; there might be a bootleg ground; the neutral wires might be connected to ground in a subpanel; you might have a neutral wire switch, or a maybe a 20 amp breaker on size 14 wire; and so on.

If you know for a fact that only licensed guys did the wiring you are working on, and it was inspected and passed by the city, ok, then the info in the YouTube video might be all you need.  But can you really be totally sure?

The real reason I am writing this is, if you decide to do some electrical work on your house, even just re wiring a lamp, take some time to learn about hots and neutrals and get yourself a multimeter and learn how to use it.   Discover just how much you don’t know.  And don’t rely on any one single  YouTube video, they consistently neglect to cover every variation you may encounter.    My big complaint is that these videos always make it sound simple. This can lead to overconfidence, and that overconfidence can be genuinely lethal.