Adventures in Matching Stain

Well this is something that only a handyman would be thrilled by,

So I am assisting a client on a kitchen remodel.  The builders took out about half of the 100 year old woodwork and replaced it with new bare wood, and the juxtaposition was gruesome.  At this point I think most people would just give up and paint.
This is a perfect example of how handymanning is SO much different than regular building, because SO SO SO often you have to MATCH the color or look of something that has been out of stock or style for decades.
So I started my research, and first thing i learned is, the color of a given single can of wood stain VARIES ENORMOUSLY depending on the wood you are staining.   I did not know this of course, so I had to learn the hard way (Oh gosh, didnt we tell you??)
So after numerous not-matching at all failures ( here, they are sitting on a drawer from the original kitchen)
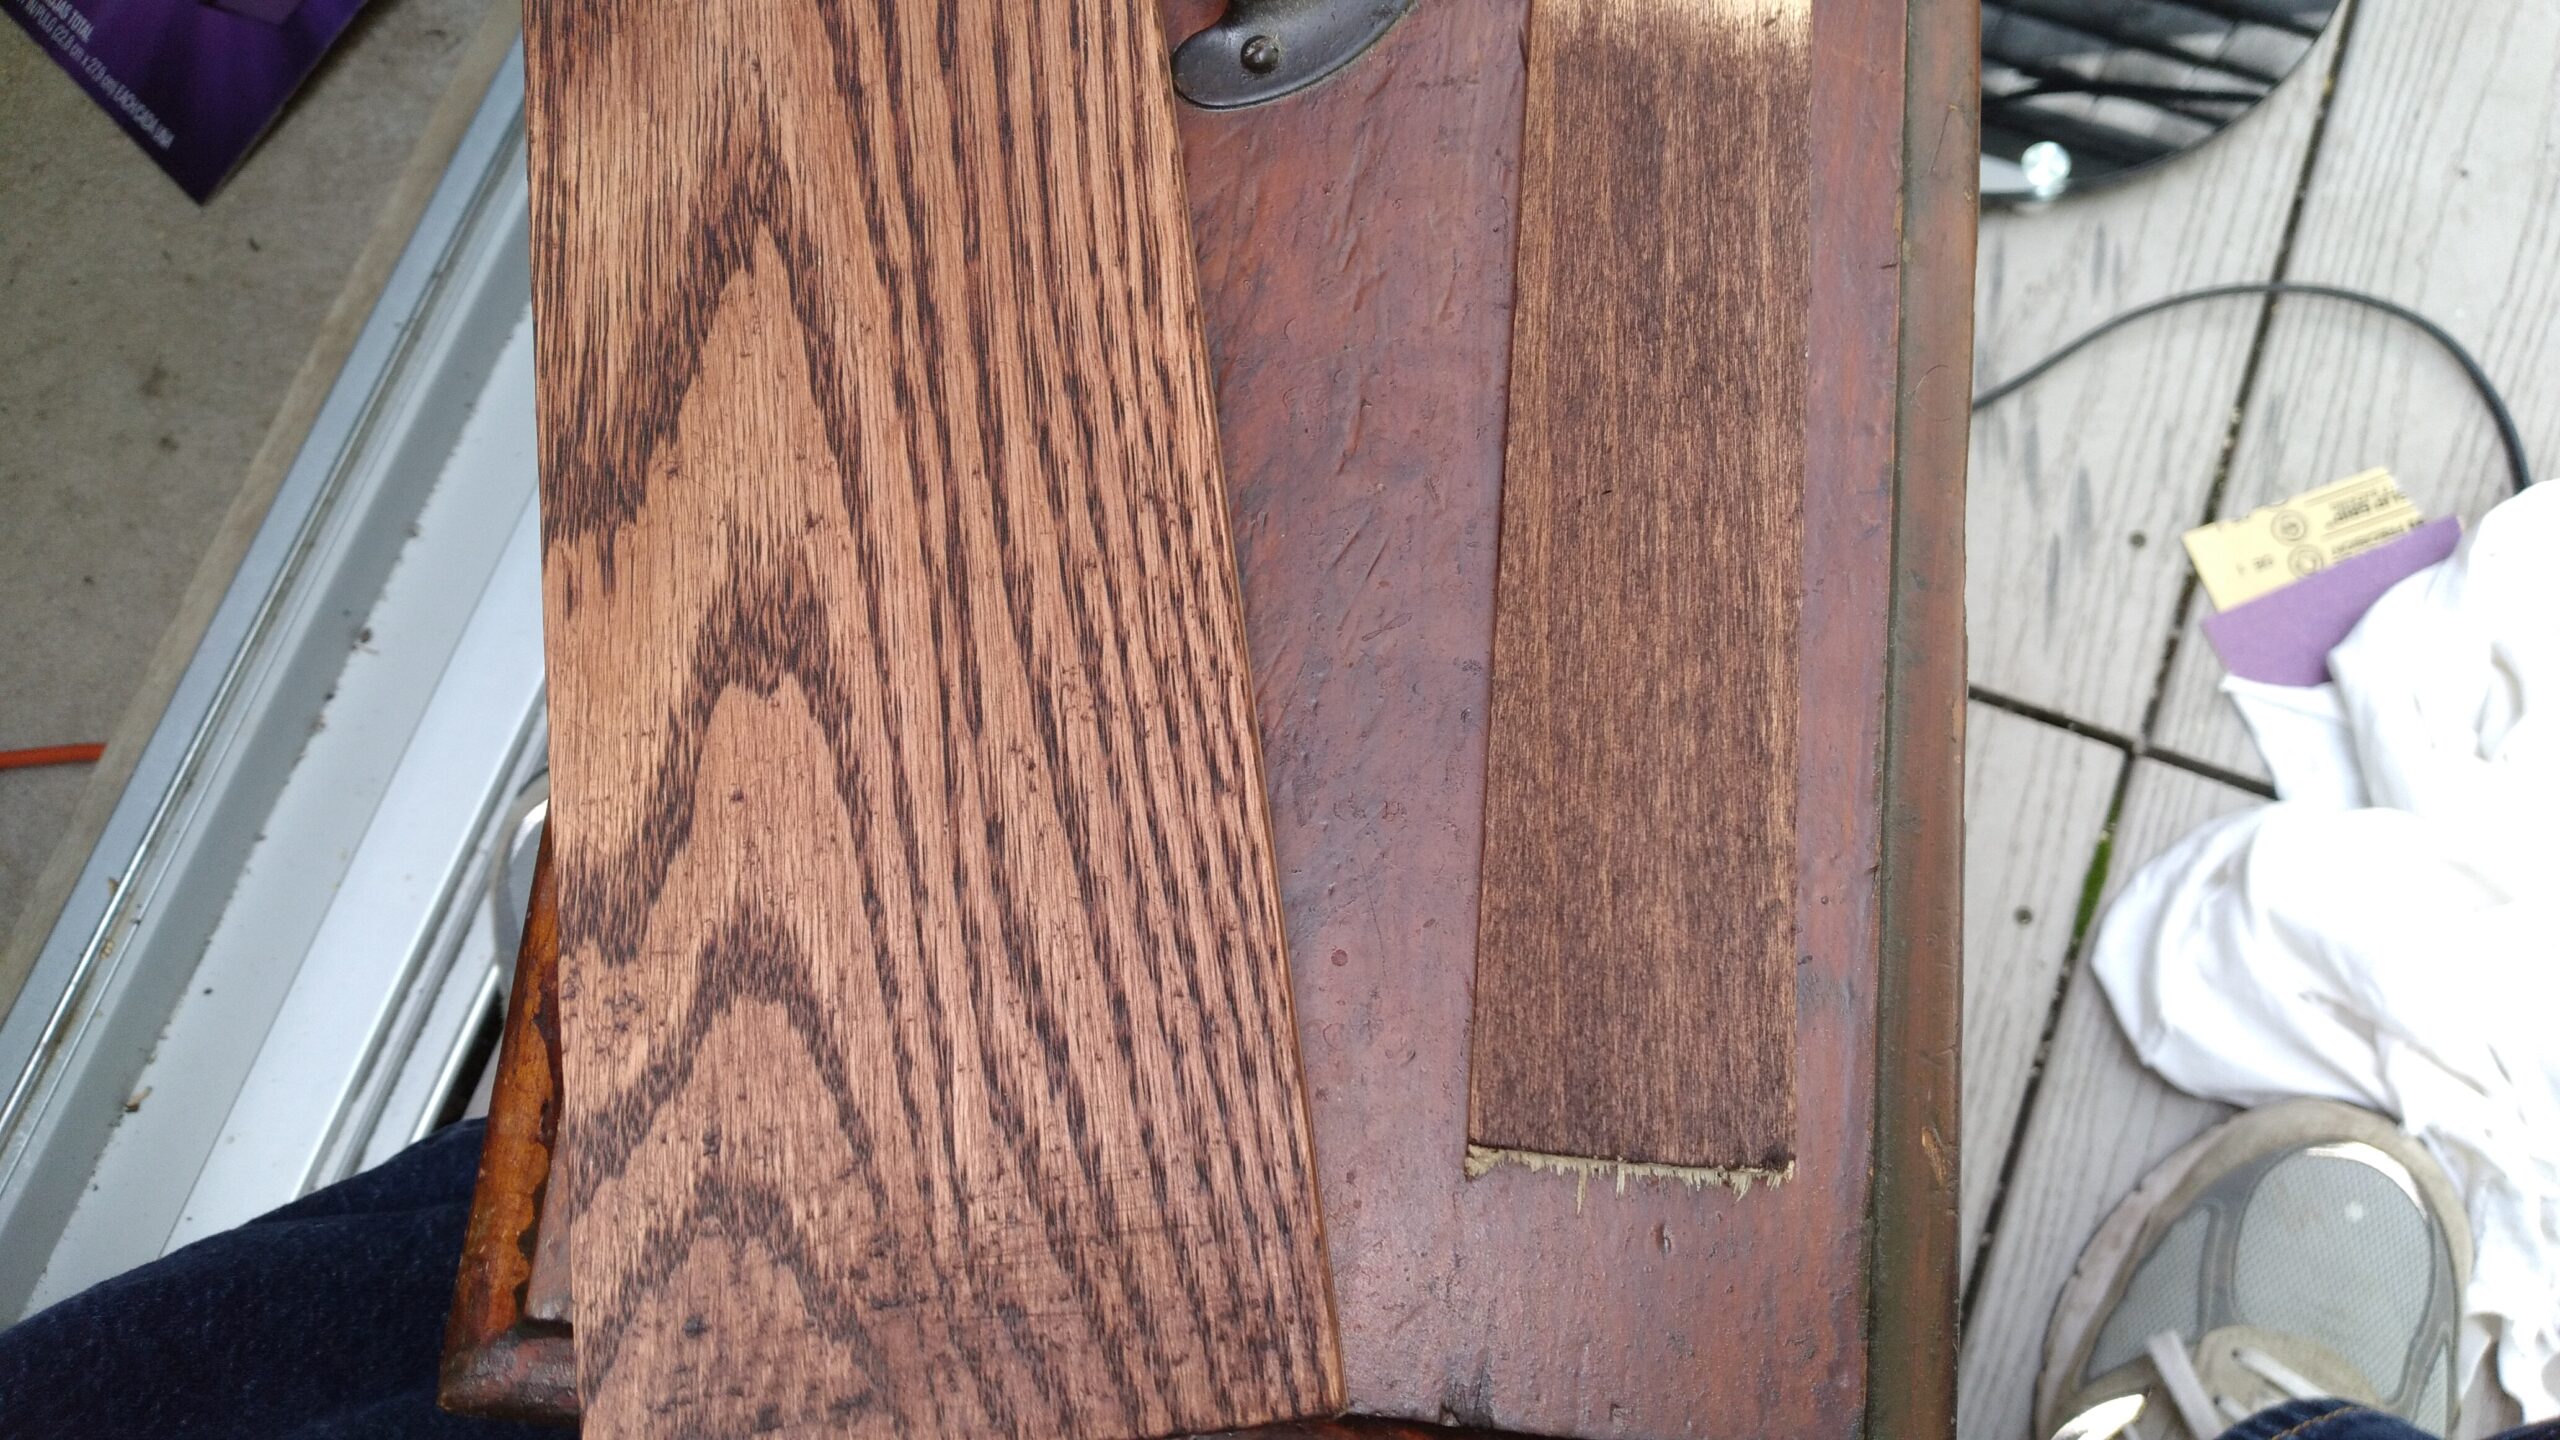
I finally got BOTH a sample of the existing woodwork ( a drawer) AND a piece of the wood the builders used.  wahoo.
So after a few more failures I tried one more stain and VIOLA  I got a nearly perfect match of the original color.
Of course the old woodwork is distressed with nicks and gouges and black smudges all over which is either oxidization or the oil of a thousand hands that once touched it or both . . .  but I can use the darker stain I bought to replicate that effect, so if you look DEAD CENTER on the test below you can see how that one section is a perfect match to the old finish.  Again, wahoo.   (on the right board, top right is the one color that closely matches original original, and bottom right is a previous test that was too brown and too dark.)
So I need to play with it and practice before diving in to the actual kitchen. . . .  and next, I need to test the satin poly I bought for a top coat and see if THAT matches adequately . . . .  And of course to get really nuts I will have to beat it up with nicks and scratches and gouges.
This is such a relief, for a while there nothing was working.  I am so clever I can’t stand myself 😉   — jl

Working with Cement

Well let me be the first to say that I am not a mason.  For a long time I have avoided working with concrete, mostly because it seemed very mysterious to me.  Also, unlike other realms of handymanning, there is precious little access to knowledgeable people to seek advice therefrom.

However, handyman work is all about customer need, and lately I have been running into multiple clients who have relatively small concrete oriented jobs, and as always, I get the lament that “I can’t find anyone to do it.”  So, in I dive.

Concrete work feels very much like baking.  You have the concrete with is very much like flour, you add water, and then you mix it up just so.  Grout, a form of concrete, has amazingly precise instructions for mixing for x minutes then let it sit for Y minutes.   Then you have quick setting concrete also known as instant in the food world . . .

The real trouble with concrete is, if you screw it up, you have a VERY heavy VERY stuck on glop of stuff that can be close to impossible to remove, so everything gets to be very high stress.

Anyway, last week a client asked me to deal with a brick wall, it was a low retaining wall for a front yard.  The guy who put this thing in decided for some reason to use construction adhesive instead of mortar, and most of it lost all structural integrity.  So now I have a bunch of loose bricks with glops and glops of goo under each brick.  And here is the massive irony du jour:  dry/old construction adhesive . . .  will not adhere to any kind of mortar, nor will it adhere to new adhesive.  Not even the super duper varieties,  You see, they all want to bond to a porous surface, and dried adhesive is anything but.  and believe me I researched . . . I called quikrete, I talked to every dept at Home Depot, I talked to Loctite, . . .  and . . .  nothing.

So, my only option is to somehow get all that dried goop off of each brick . . .

This wall had a few corner pieces made out of triangles, and those HAD to be fixed, so I wire-wheeled the old goop off the backs of each piece, PLUS the tops of the bricks below.  it took for gosh darned ever.

To make extra sure, I used a hammer drill to make holes in all the surfaces to makes sure to get a good bond.  So I succeeded there anyway, and it was necessary, as the triangles were falling off at the slightest provocation.


the  pic above is a rough in, below is the final.

I ALSO learned that cement  is way more dangerous than we are generally led to believe.  When I buy paint I am inundated with lead paint warnings, but I can walk to the cement warehouse at home depot and the cancer causing silica dust contained in leaky paper bags is just wafting in the breeze.  And while they mention that one should wear gloves, no one really explains just how nasty and dangerous wet cement can be on human skin.  It can burn you just like acid, only backwards.  I learned this the hard way last spring.

I have to say though, once I got over my initial fear of it, while it is stress inducing, cement is kinda fun . . .  sort of like making mud pies or icing a cake.  And the chemical properties, the way it gets so very hard for the rest of time, is pretty cool.  The danger of nasty consequences for making a mistake adds to the overall handyman excitement.