Monarch Butterflies

Well this post has very little to do with handymanning but I am just so excited I have to tell somebody.

Several years ago I read or heard that monarch butterflies were having a tough time of it . . .  loss of habitat, insecticides, disease . . .  so I decided I would try to do something about it.

I have a phrase I try to share with folks when it comes to making changes, which is, “take an inventory of your power.”  After all, your power is all you have to work with, so, look around and see what you got.

So I decided, I don’t have power to pass any legislation but I CAN plant some milkweed for them to eat as they fly by on way to Mexico.

A little embarrassing, this is how ignorant I was:  I actually thought adult monarchs would just stop in as they flew by and drink some milkweed flower nectar.  And on that impression alone, I got some pots and some dirt and a shipment from cheapmilkweedseeds.com and gave it a go.

I was late planting but six plants came up.  They were little stumps, and of course no monarchs even looked at them.

I did virtually nothing for a year but lo and behold, the milkweed stumps actually grew into milkweed plants.  They flowered, but . . . nothing else.   At end of season the flowers turned into seed pods and flew all over.  Again, forgot all about it.

But what I did not realize was. all those seeds had landed in all my other pots, and this year, I had milkweed all over.  They grew to good size, and then . . .  and then . . . holes appeared in the leaves.  A momma monarch had found my plants worthy.  I soon had 3 little monarch caterpillars.  Oh Joy oh rapture.

So for the past 10 days I have been observing these little guys eating and growing.  Utterly fascinating.

I have to tell you, this guy was a cross between Tarzan and Nadia Comaneci.

This morning they all crawled off into the wild green yonder to pupate.  So Mother Nature started with a momma and a daddy, that’s two, and I sent back three.  Such a deal.  I made a difference.  I had the power.


Rusted Radiator Cover

One of the problems I have in doing this blog is, I don’t necessarily have permission from clients to show the interior of their homes.   So I end up using pix of jobs done for friends and/or family, or for myself.  So I fear my “real” work doesn’t get showcased as much as I would like, but, c’est la guerre.

Anyway, latest project, I live in an apartment complex and soon after moving in I noticed a rust issue on a radiator cover.  This had an obvious cause, the radiator gets hit with shower spray and gets wet.   And I decided it was time to deal with it.  Note it wasn’t TOO bad but then I scraped off the layer of paint that was covering the rust and  . . . oh brother . . .

And, to avoid keeping you in suspense, here it is, more or less done:

It was pretty obvious to me that, before I moved in, the rust issue existed, and someone on the maintenance crew had just covered the rust with a layer of latex and walked away, so of course, it just re-manifested.  So  . . .   Justin the Handyman to the rescue, let’s do it RIGHT  . . .

So I got out my tools and a wire wheel on a drill and scraped off all the loose paint and got to what you see above.

Next I put on some blue masking tape, then I took some Rustoleum Rusty Metal Primer and painted it on, see next 2 pix:

 
And finally, again, after waiting 72 hours, I topcoated it.

The trouble with rental properties is, all too often the goal is to just get to close enough and not do it properly . . .  BUT, unlike my predecessors who just did slap dash, the Rustoleum rusty metal primer will actually stabilize the rust and make it a nice solid surface which should prevent a return of the rust for at least a year.   The mgmt gave me some latex paint to use as topcoat but it doesn’t match . . .  again, rental properties . . . I can always take  some of the older paint I scraped off (and saved) to Home Depot and get a sample size jar, and that should match pretty good.  Stay tuned!


Handy Busman’s Holiday

One of the many benefits of being a handyman is, when you need something done, you can generally do it yourself.  I had two such projects lately:

The first was my bike.  I have had this bike for 40 years and it was needing some love and attention.  Here you can see the original “stem” style shifters that I have had all this time and frankly, I always hated them.  Not only did I have to take my hands off the handlebars to do any shifting, but they were terribly inexact and had to be fussed with on each shift.

But now you see the new “grip shifter” I installed for the rear derailleur:

FYI  the handlebar grip cover is missing in photo  . . .  and I confess I had to take the bike to the shop for a final fitting, as the frame had gotten twisted out of true.  But it’s just so fabulous to have this, makes shifting SO much easier.

I also bought and installed new tubes and tires, plus at long last I have a kickstand (what a massive upgrade!), and I am cleaning off all the rust (My Dremel tool came in VERY handy for that!).  I am calling this the summer of bike, I am really getting out and biking around.

Next, I have been meaning to do this for a while, I swapped out the spark plugs on my vintage Honda Civic:

  This could have been a classic handymanning post all by itself.   A few gremlins encountered:  One, the manual said to “gap” the plugs to 1.1 mm, but the plugs now made for my car come “pre-gapped” with a 1mm gap, and I am NOT supposed to touch them.  Plus, while the manual says to use 13 ft lbs on a torque wrench (Hey, I learned how to use a torque wrench in the process), NGK, the makers of the plug, said to use 18 ft lbs to properly crush the washers . . . but I simply could not turn it any further, the torque wrench only went to 14 ft lbs measurement, and NGK help line was fine by my just turning it 180 degrees past hand tight, so I left it.

Always kinda dicey doing this kind of work as you can really screw up your car if you make a mistake but . . . I immediately took it out for a test drive and OH MY  what a difference in general zip!  I have been constantly bugging my mechanic about putting these in and he always said not to worry about it . . . but in this case,  he was wrong, it really needed it.


And Still More Lint (frij this time)

My apartment’s frij was making an annoying buzzing noise, so rather than be a wimp and call building maintenance I decided to see if I could just fix it myself.  So I pulled the frij out, gave it a good whack at top back, and the noise stopped.  I do amaze myself.

But once I had the frij pulled out, I looked down at the bottom and . . . UH OH . . .

Thar ’twas, a whole lot of lint buildup on the vent openings of the cardboard back of this frij.

So 3 screws off, and I exposed the cylindrical cooling coil of the unit:

Isn’t that just lovely.  All of the air in my apartment was being blown thru all that crud.  ICK.  (Bear in mind I had just cleaned this thing a year ago)

So, a little gentle (GENTLE) brushing with a paintbrush and tooth brush and my hand vac, and VIOLA
Probably saving what, fifty bucks a year on my electric bill?  plus all the CO not emitted?  plus my apartment air is cleaner?  Not bad for 20 minutes of effort.  I would guess that 85% of all refrigerators in the country are even dirtier.

Harder than Chinese Algebra

Well greetings dear readers,

I am sure you are already sick of listening to me complaining about the assembly instructions for furniture imported from China, so . . . grab the Pepto, here comes another one.

This project was a MCombo storage shed.  here is finished project, actually looks kind of okay when done,

So here is my complaint,  as you can see above there is a post running down the center front, here is a shot of the directions:


Hopefully you can see the two little rectangles on the post.  Now it is POSSIBLE that the little markings on the cross pieces would have implied that this was a rear view, but why why why make me work so hard?  (Also there is no indication of which end of post is top or bottom)   Anyway, following that hint, here is how I initially put it together:

As you can see, this matches the rectangles showing in the instructions  BUT   what is not at all clear from these drawings is, that is a REAR VIEW of the post, it needs to go in so the rectangles are facing away, as they are there to support some cross beams to hold the shelves.  (and there is no “poka yoke” to prevent incorrect installation)  So here is, correct:

Next, the big shelf going full left to right, even though there are 2 pieces of wood on the sides looking like they hold that shelf, that is actually the floor of the shed.  Again I had to do some disassembly to correct that error.

And it was also confusing how to put the back wall in . . .

All in all this took me 7.5 hours, with better directions would have taken 5.

I sometimes wonder what the mindset is of the folks who do this.  I understand the language issues but surely they could give just a little more detail instead of constantly trying to do directions with as little information as possible.

For search engines, this was an:

MCombo 6056- 1400D   assembly


Constructive Criticism for EMCO Doors

Well yesterday I went over to a regular client’s house to install an EMCO storm door:

So a little prelude,  a contractor guy I occasionally work with sent me this job.  He is a highly skilled guy, I was told he had measured the door opening, recommended the door to the client, so I was kind sorta assuming he had done the necessary preproduction research.  I had never done one of these things from scratch before so, I was being overly bold.

I spent a whole week studying the directions and watching the videos.   When I was looking at the marketing materials for this thing I somehow got the impression that this was a 2 hour job.   Alas, this overly rosy assessment from the marketing people was an exaggeration to say the least.  I just barely got the thing hung and the knob installed (but no closer yet), and that took over six hours. .

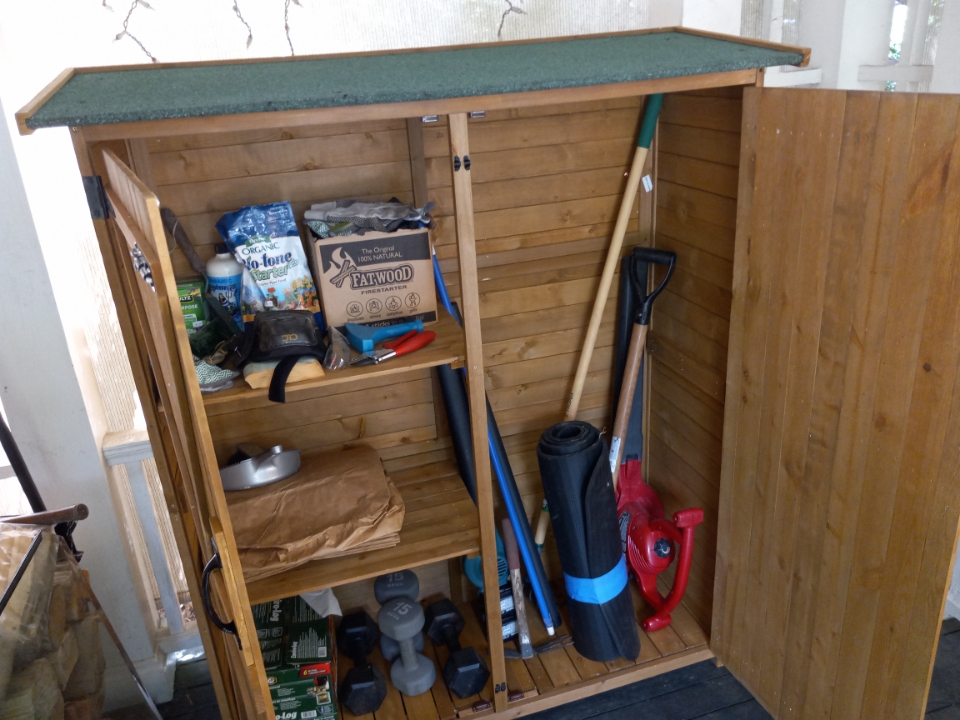
Next, EMCO, ol’ buddy ol’ pal, have you ever built anything from Wayfair?  If you had, you would know that it’s really handy to put labeling stickers on all the major parts.  As it was, I had to correlate each part (many similar looking long white sticks) with the illustration / directions.  There is one part in particular that goes on the jam and holds the strike, another that goes on the strike side of the door itself, and they are virtually identical, and the second of these is not shown in the directions at all.  yeesh.

To their credit, the colored screw holder bags were well organized.

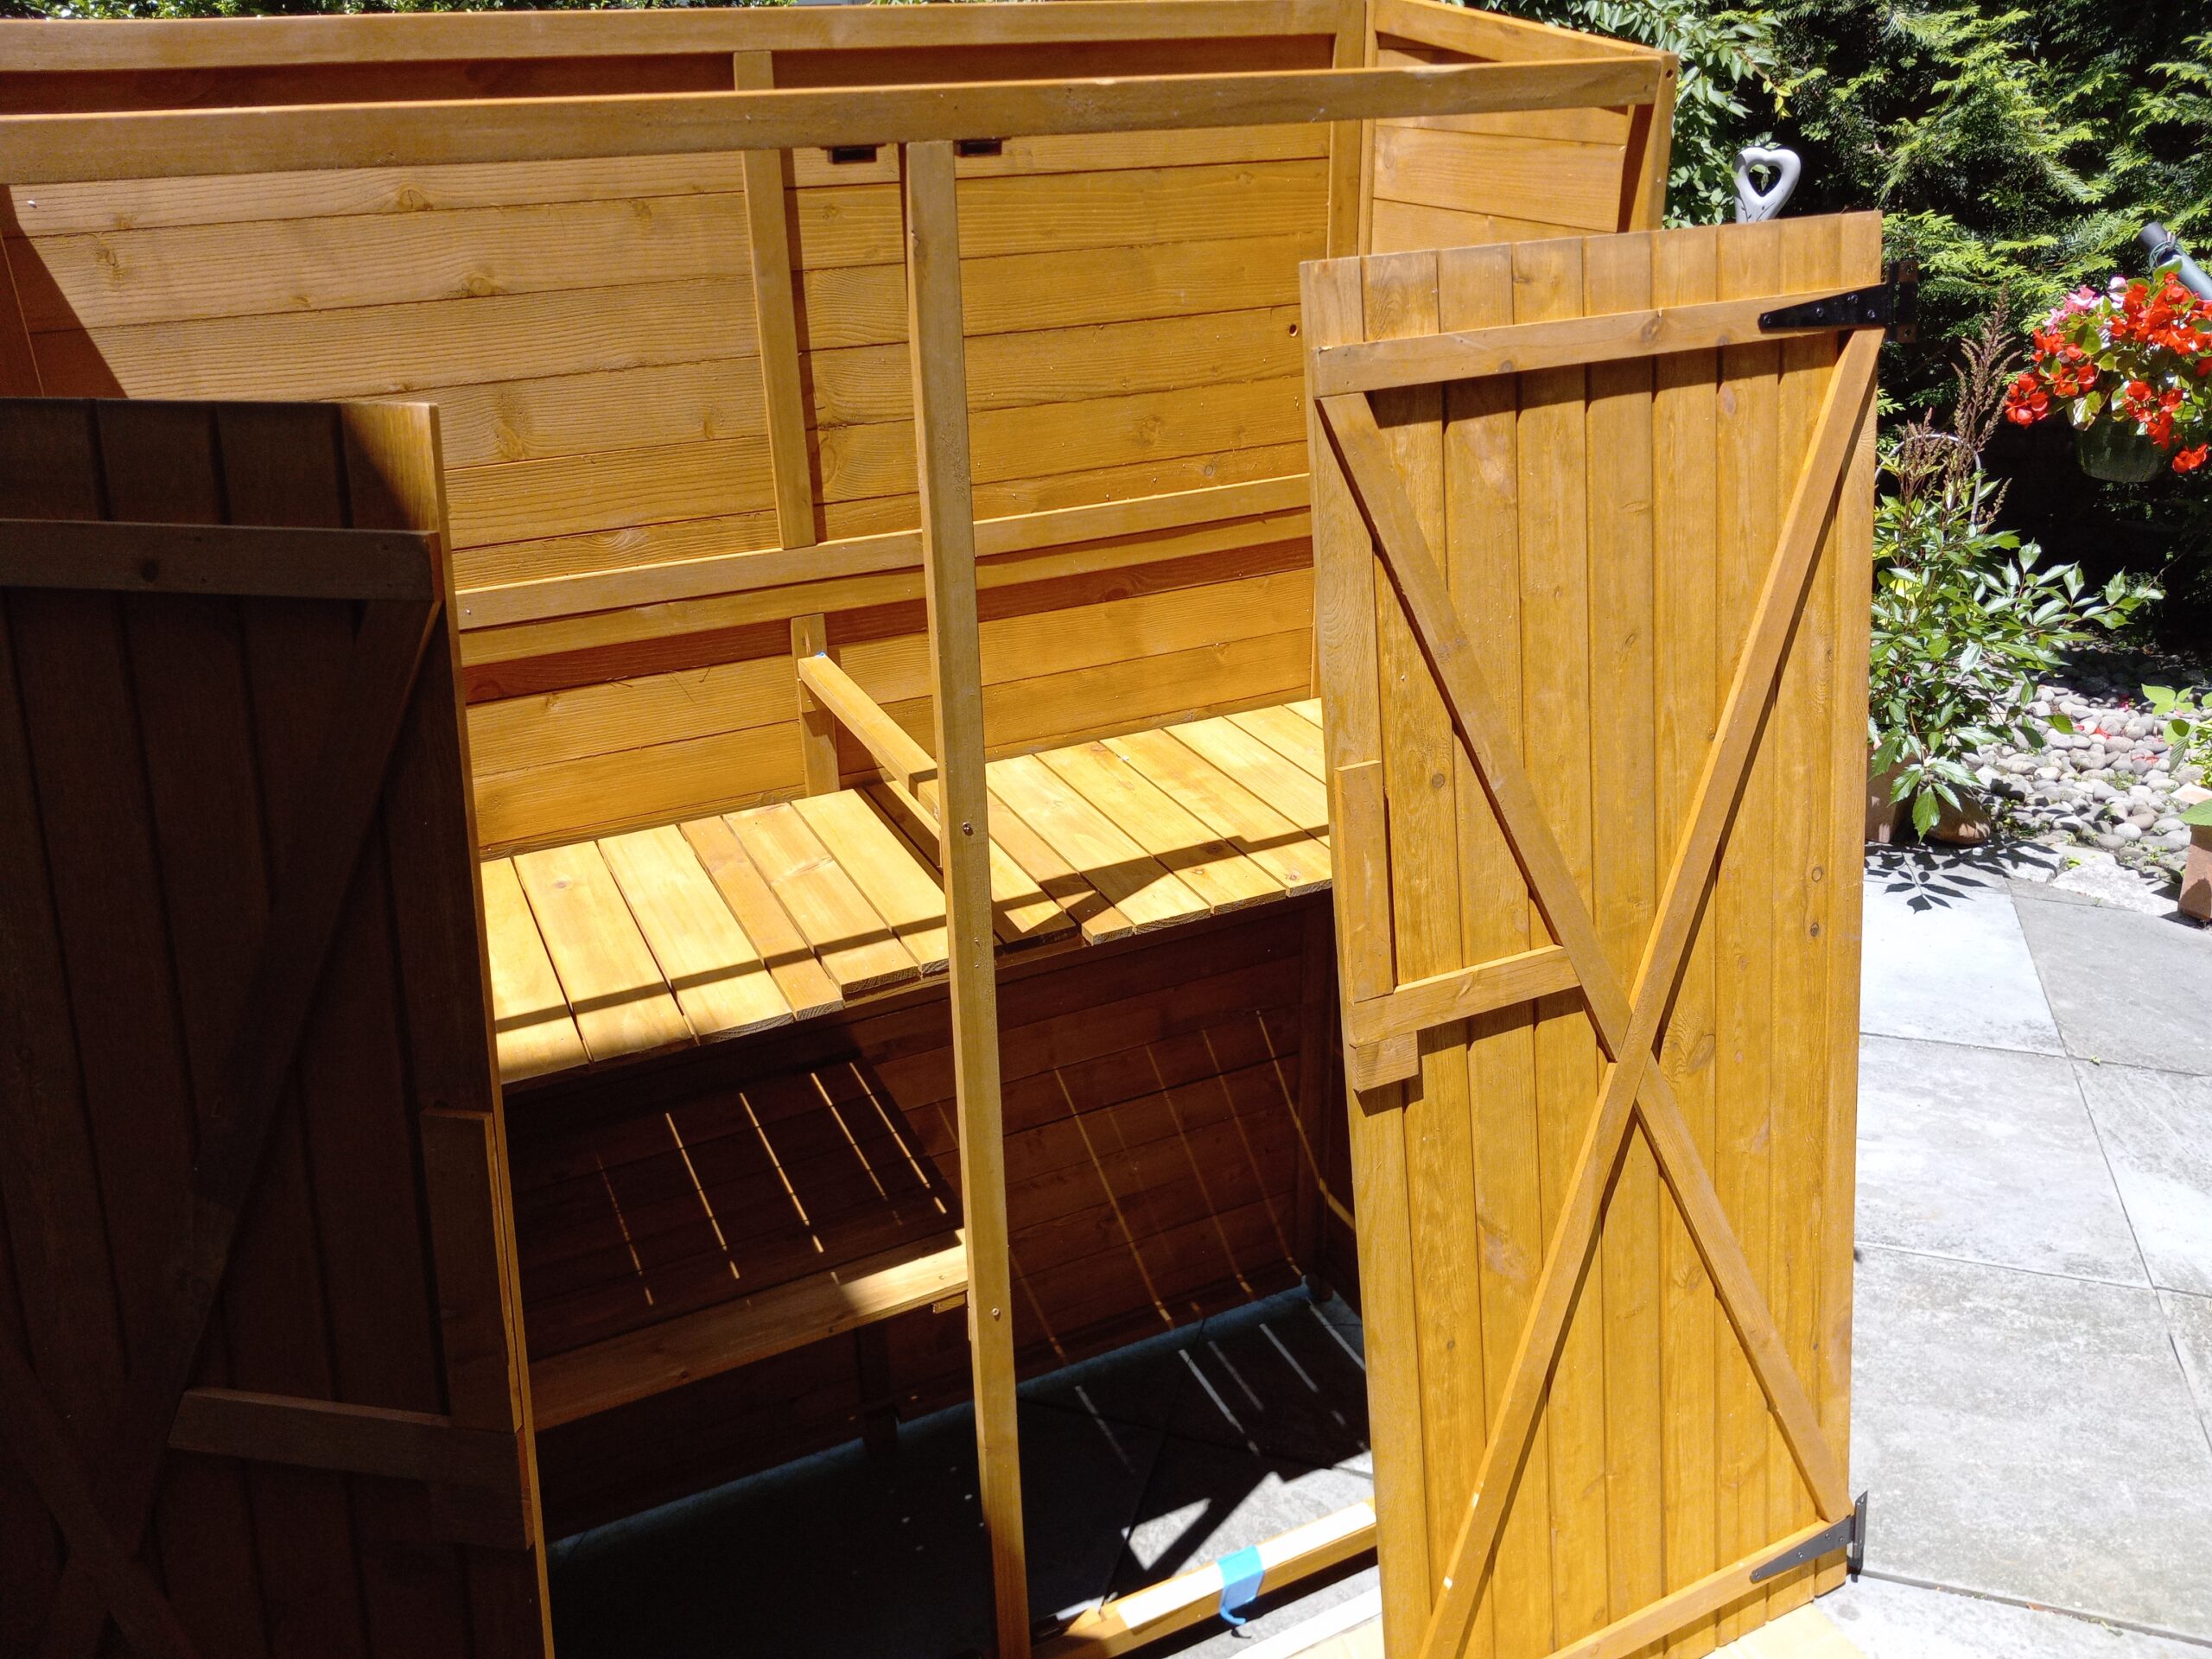
Another overall view, it seems to neophyte me that the first hour of fussing with the door is all because they made the doors universal in terms of right or left handedness, meaning, no matter which door you buy you can put the knob on the right or the left.  The sheer amount of work needed to make it one or the other makes me wonder if it is really worth it.  Instead of adding an hour to each buyer’s install time, why not just right hand and left hand doors?  Isn’t it 50-50?  But, not my business.  But at least, could you make little dimples etc to show where i need to drill 20+ precisely located  holes for that conversion instead of making me try to hold an unwieldly hinge plate while marking for the holes?

Here it is, hung, even tho I followed directions precisely there is a bit of a list to starboard due to I assume the jamb not being plumb.

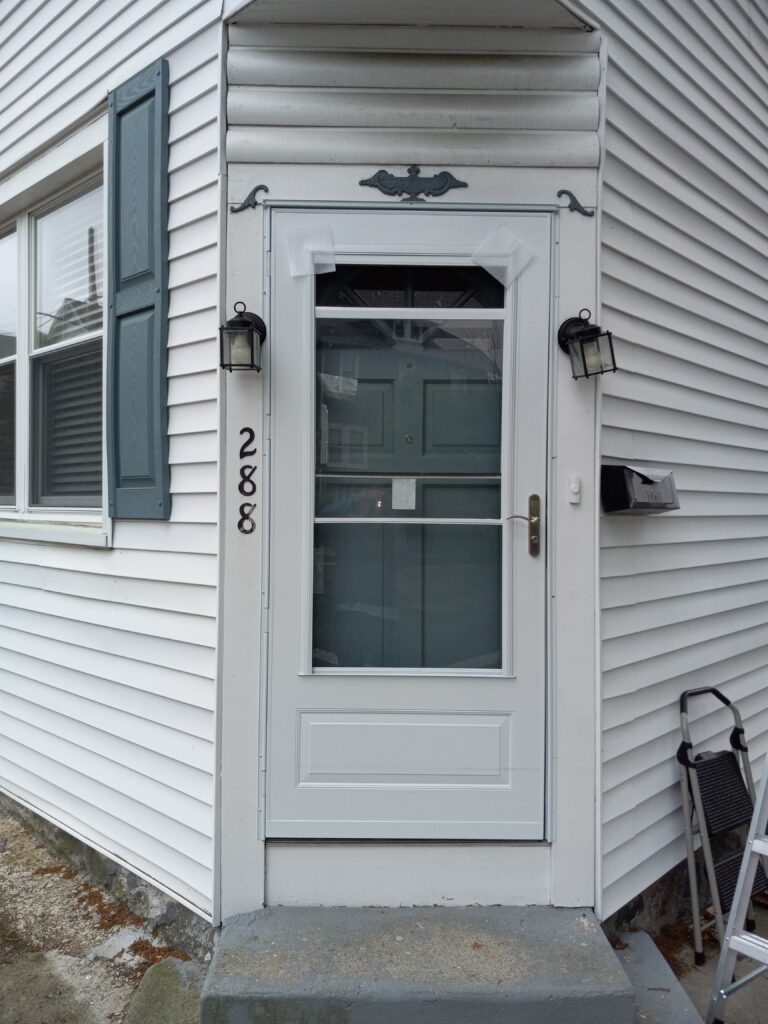
There was a little “follow orders don’t think” system for getting the door straight with some little plastic doodads, but given the weight of the door and my unique setup of 2 narrow steps I could not use it effectively.

Note the instructions for the knob install were sparse but generally very good.

Some items were not their issue, this door had a decoration above the opening and this conflicted with the “rain cap.”  So I will have to cut a piece out of the cap to make it fit.  Next visit.

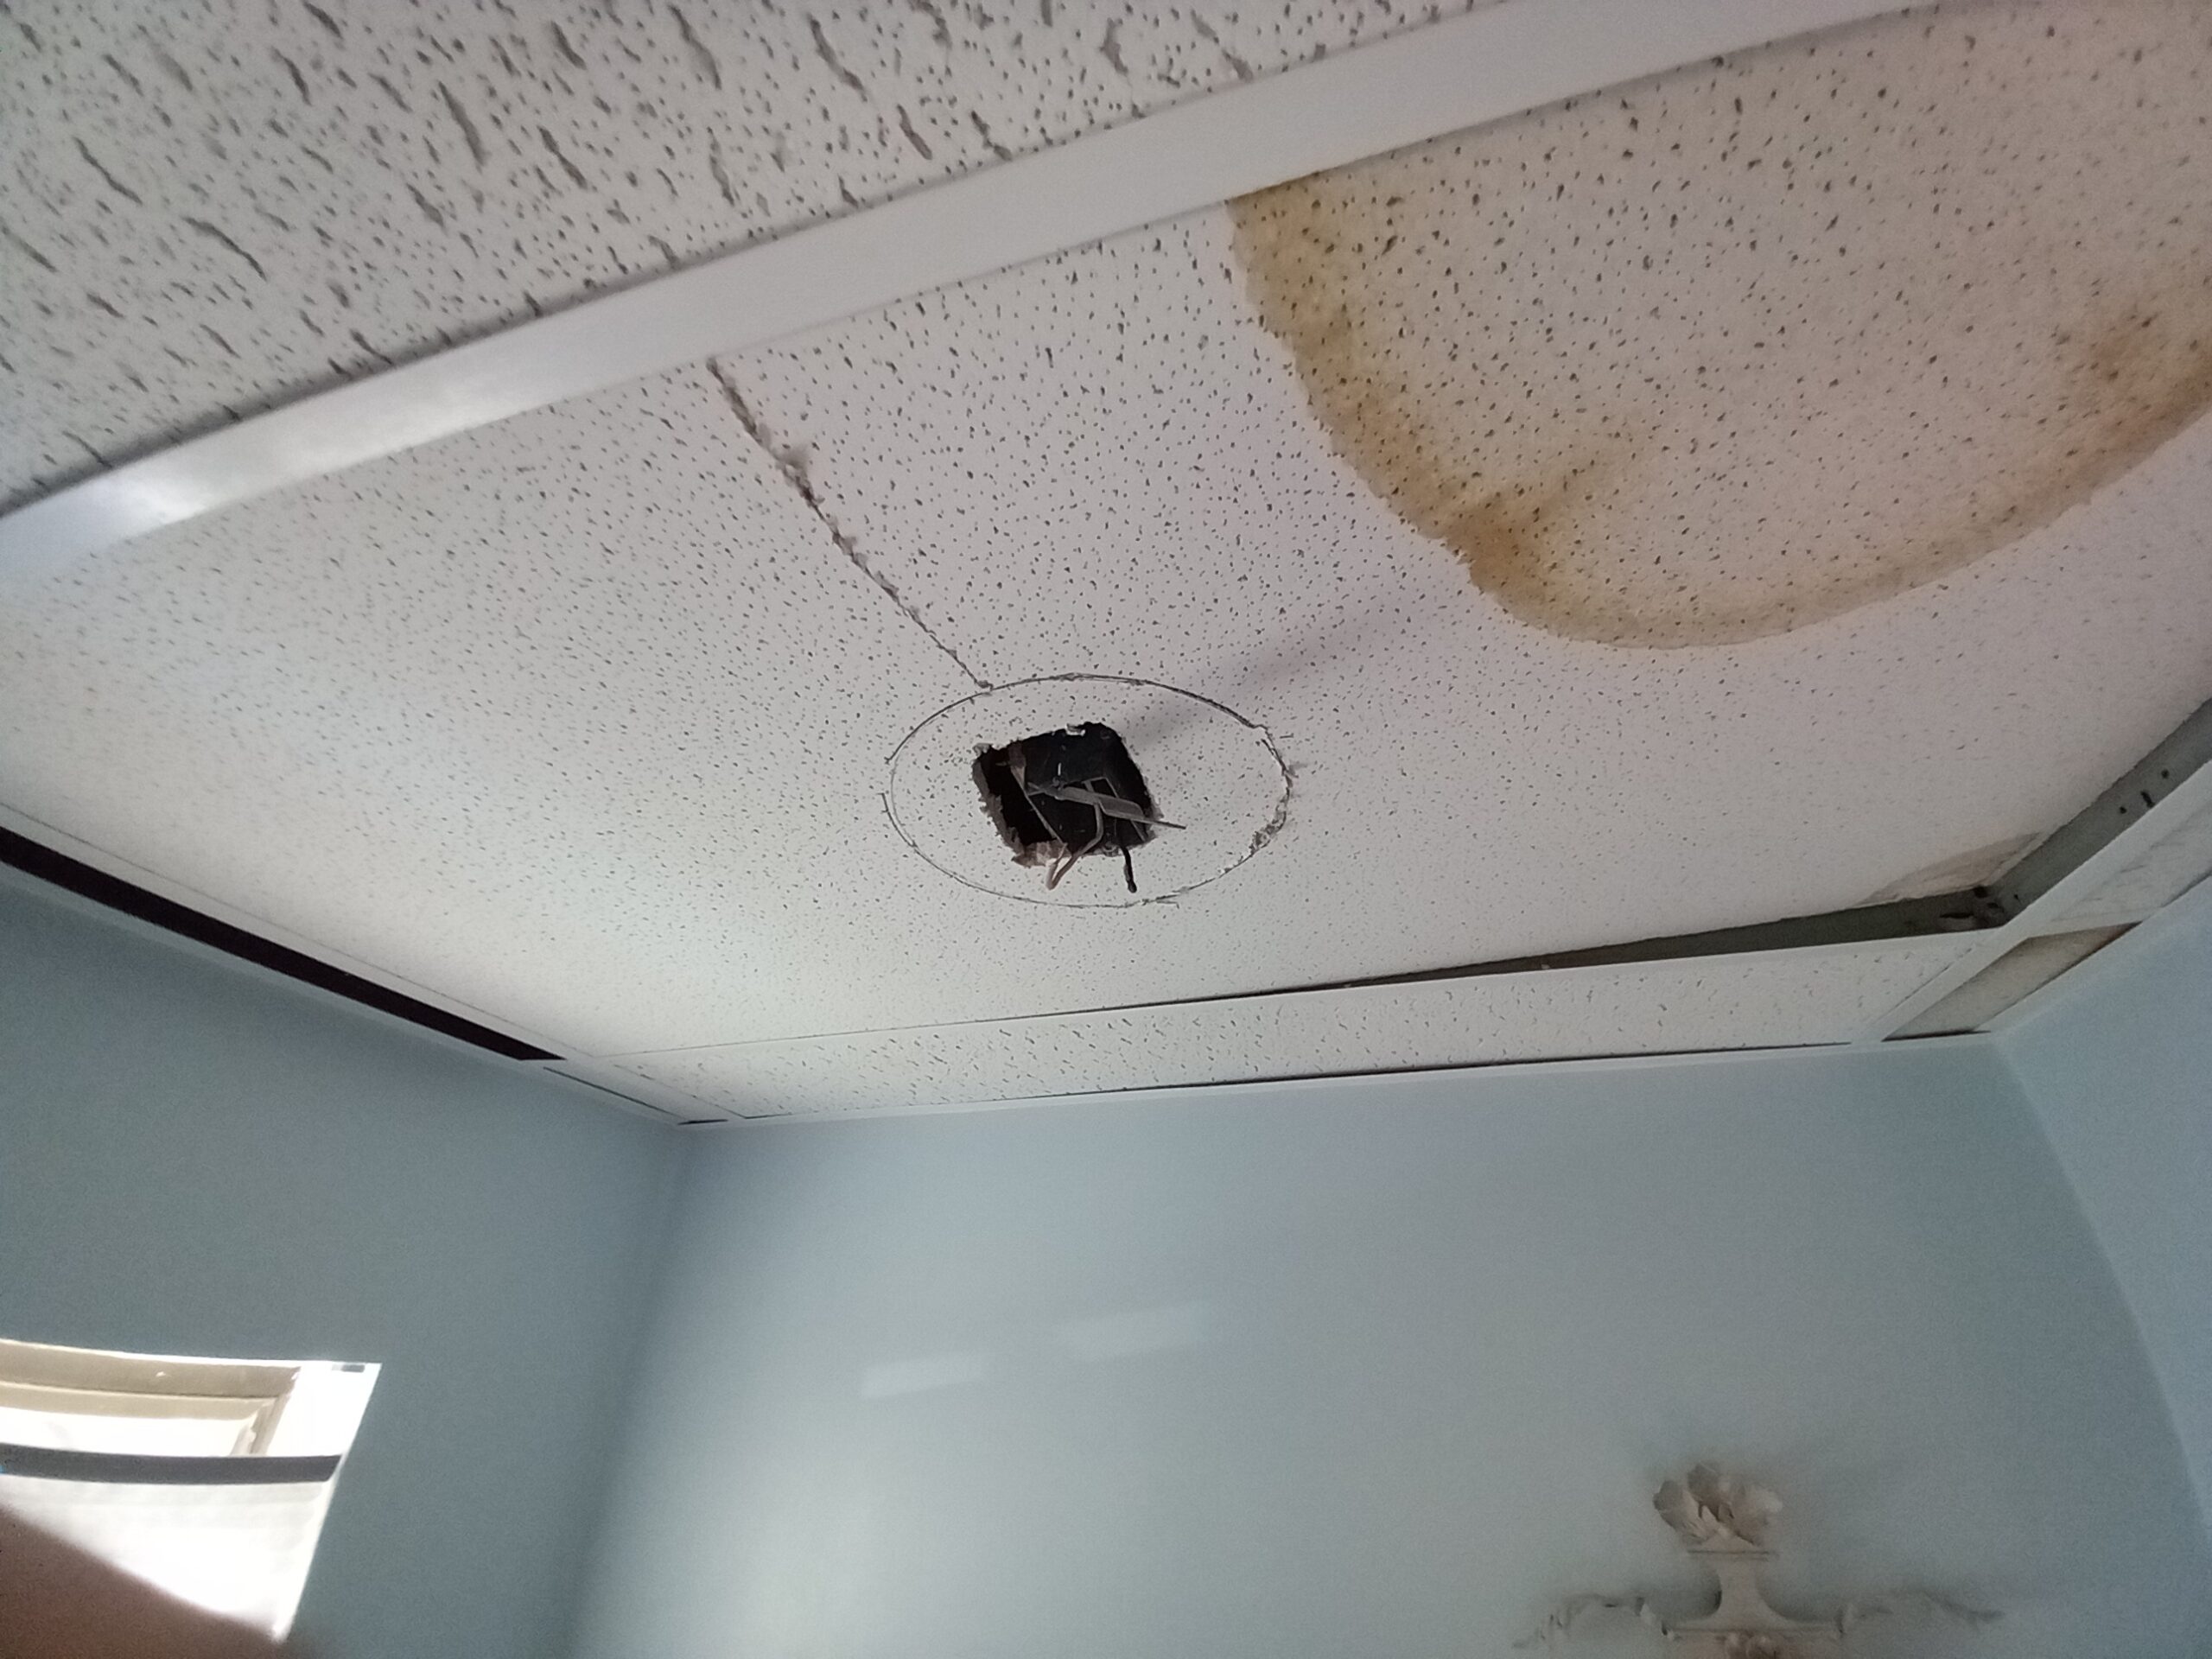
A separate complaint about the job, some amateur installed sconces and they were in the way of the side rails, so I took them off temporarily and of course I found there were no boxes, so that’s another day, with an electrician . . .  
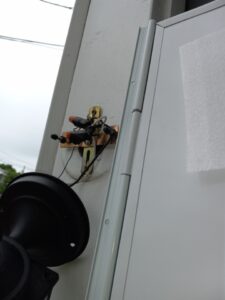
Smaller items, when I put in the sweep fin, I was told to crimp the metal around the fin, but even though I called the help line (alas, they were generally useless), and I banged it and I squeezed it, and still not crimped.

Also the client has a large keypad entry deadbolt and it conflicts with the handle, another issue borne of my not running the job from the start, also the instructions were very hard to fathom for that measurement, so looks like we will have to move the deadbolt.  not a massive crisis, but . . .

So all in all, if you have a nice clean doorway with easy access, no stoop steps, a helper, a small deadbolt, a couple of days to do it, and it’s not raining (!) (the directions pamphlet did not do well in the rain), I will still give the door a thumbs up as a decent quality item, but the whole time I was doing the job I was talking to myself about how the kit instructions could have been SO much better, especially for a first timer.   — jl


Wet Drop Ceiling Tiles

Something that I encounter on a fairly regular basis is a “drop ceiling” that has gotten wet due to a leaky roof.  Upon arrival one usually sees something like this:

Drop ceilings have their uses, but if the roof has a leak, usually the tiles are hopelessly destroyed.   The tannin in the leaves on the roof gets in the mix and it makes  this nasty brown stain.

In this case (rotated 90 degrees now), it was more than just pulling down the damaged tiles, we also had a light fixture in the mix:

At first, I thought maybe I could cut a hole in a replacement tile and somehow fit it over the fixture, but it quickly became obvious that it just would not work.  So I had to take down the fixture:

And here, tile around the light replaced, and fixture put back:    
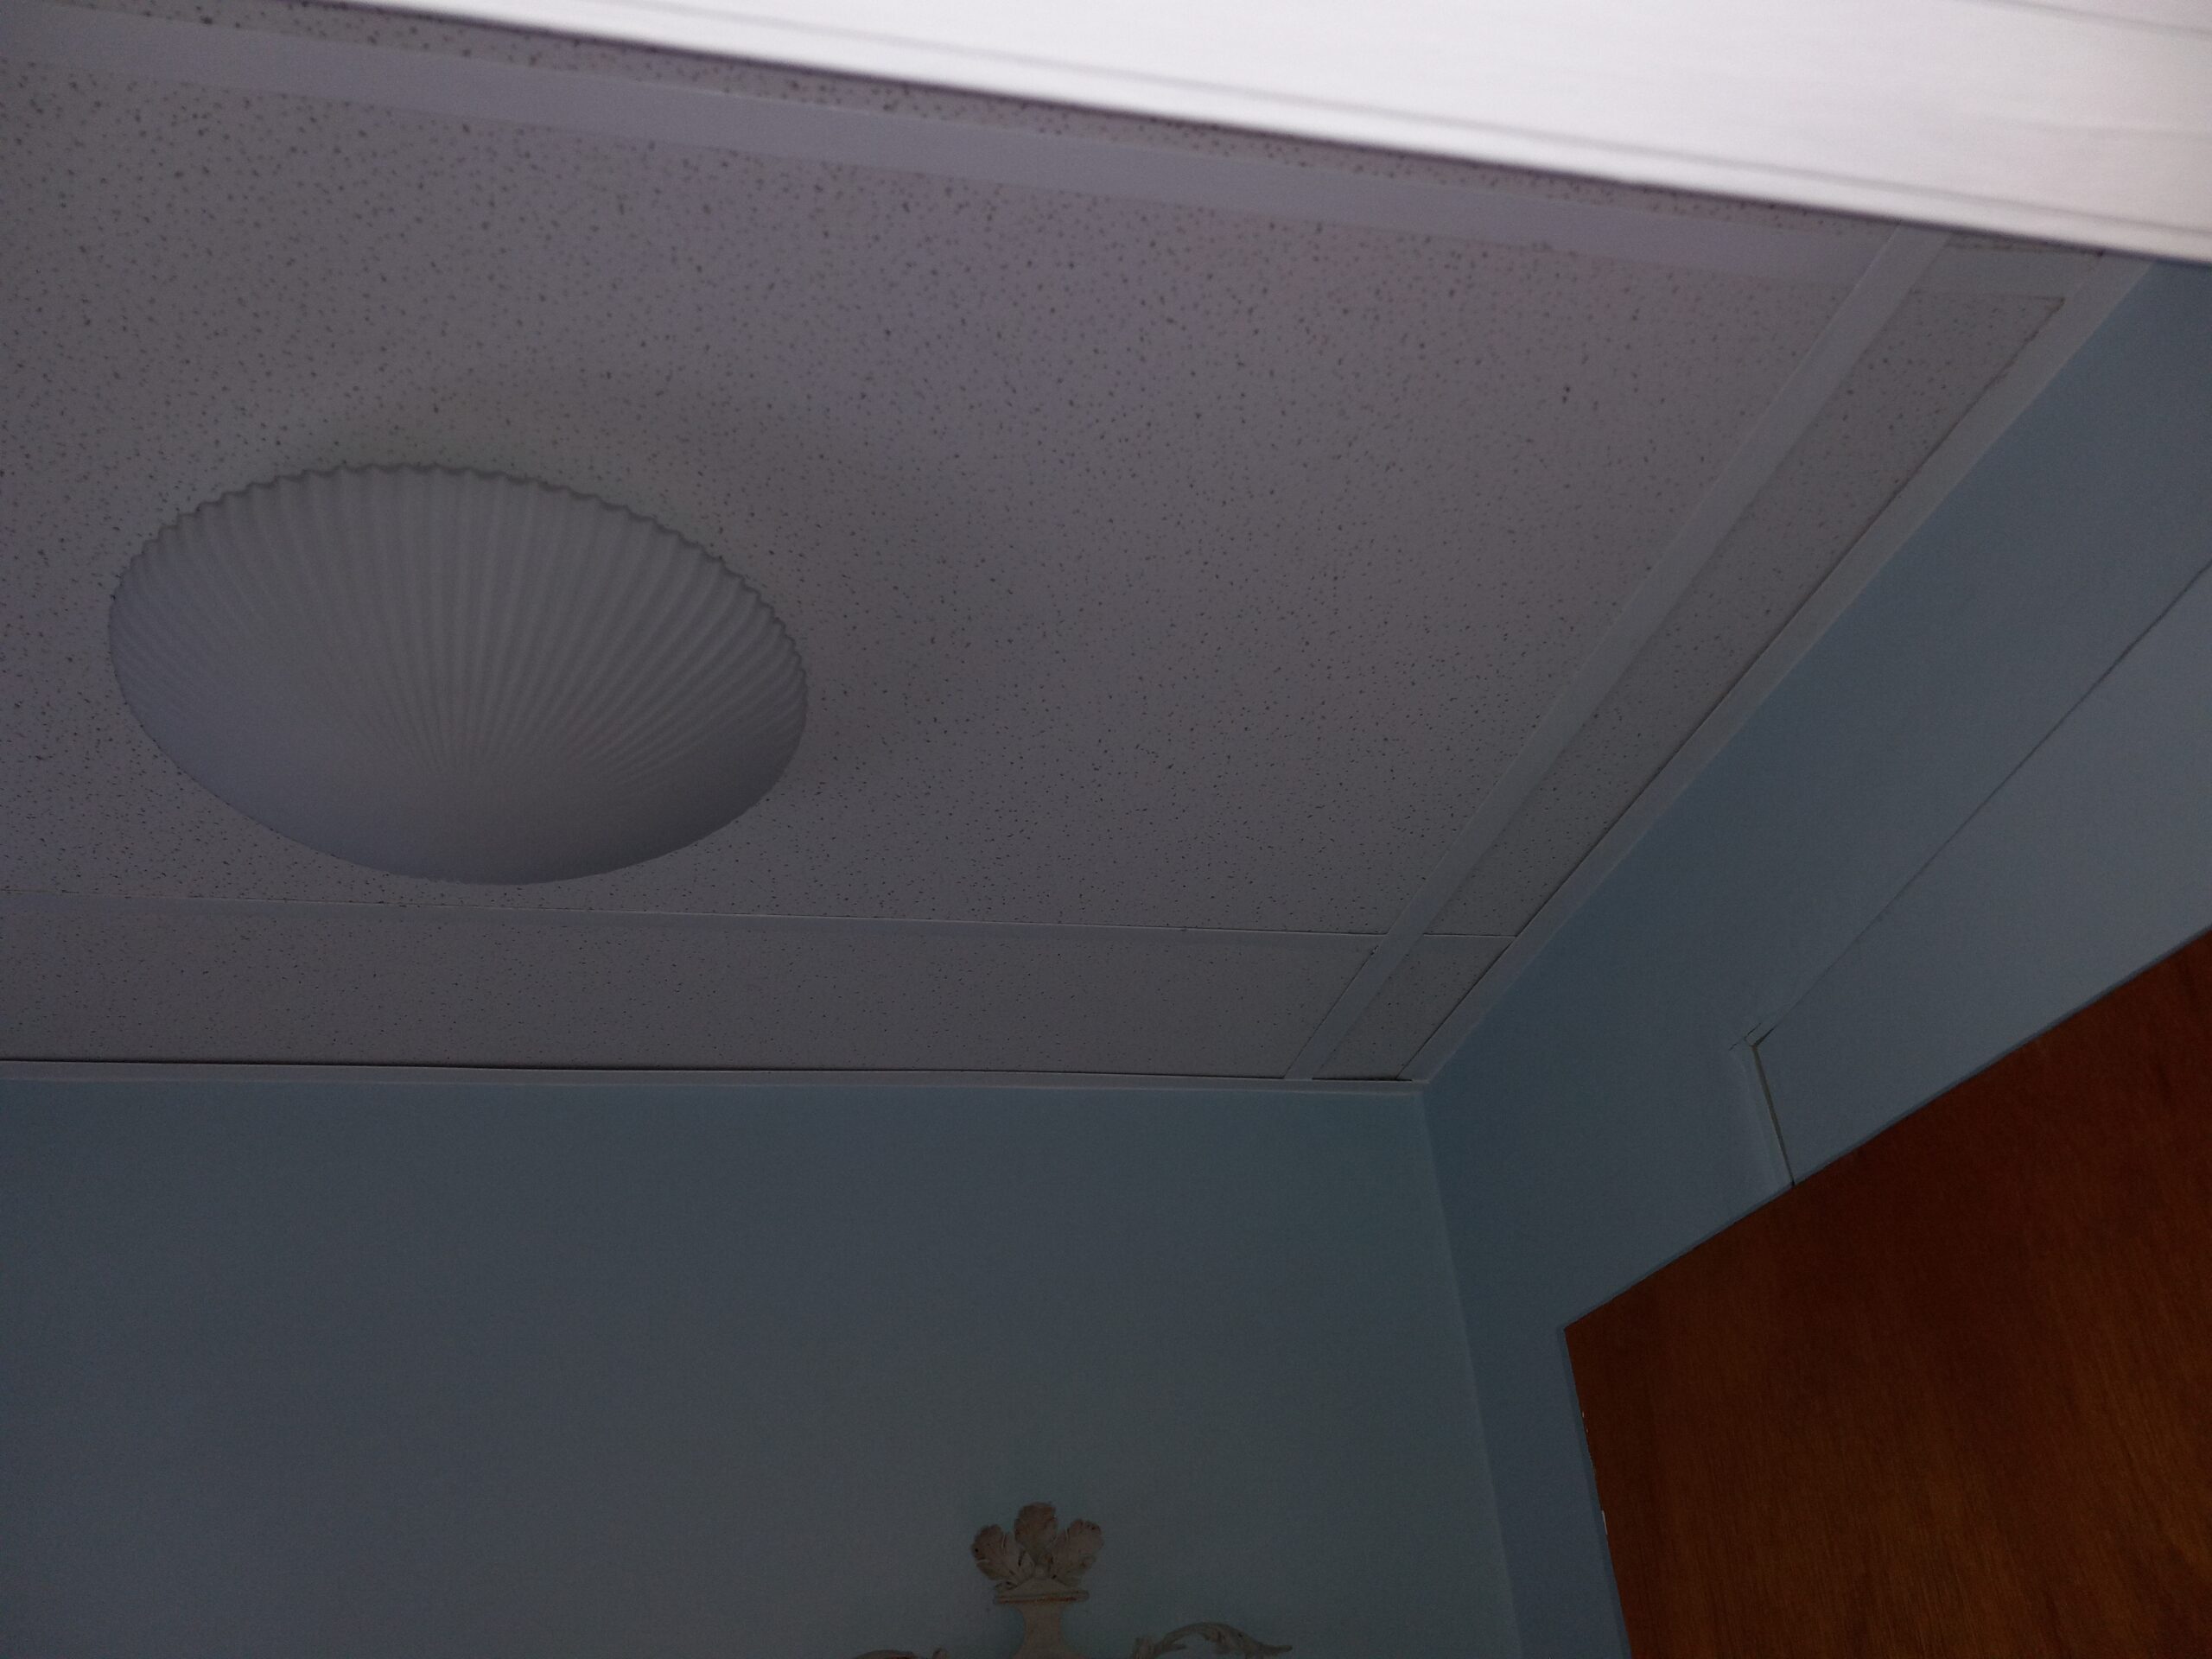
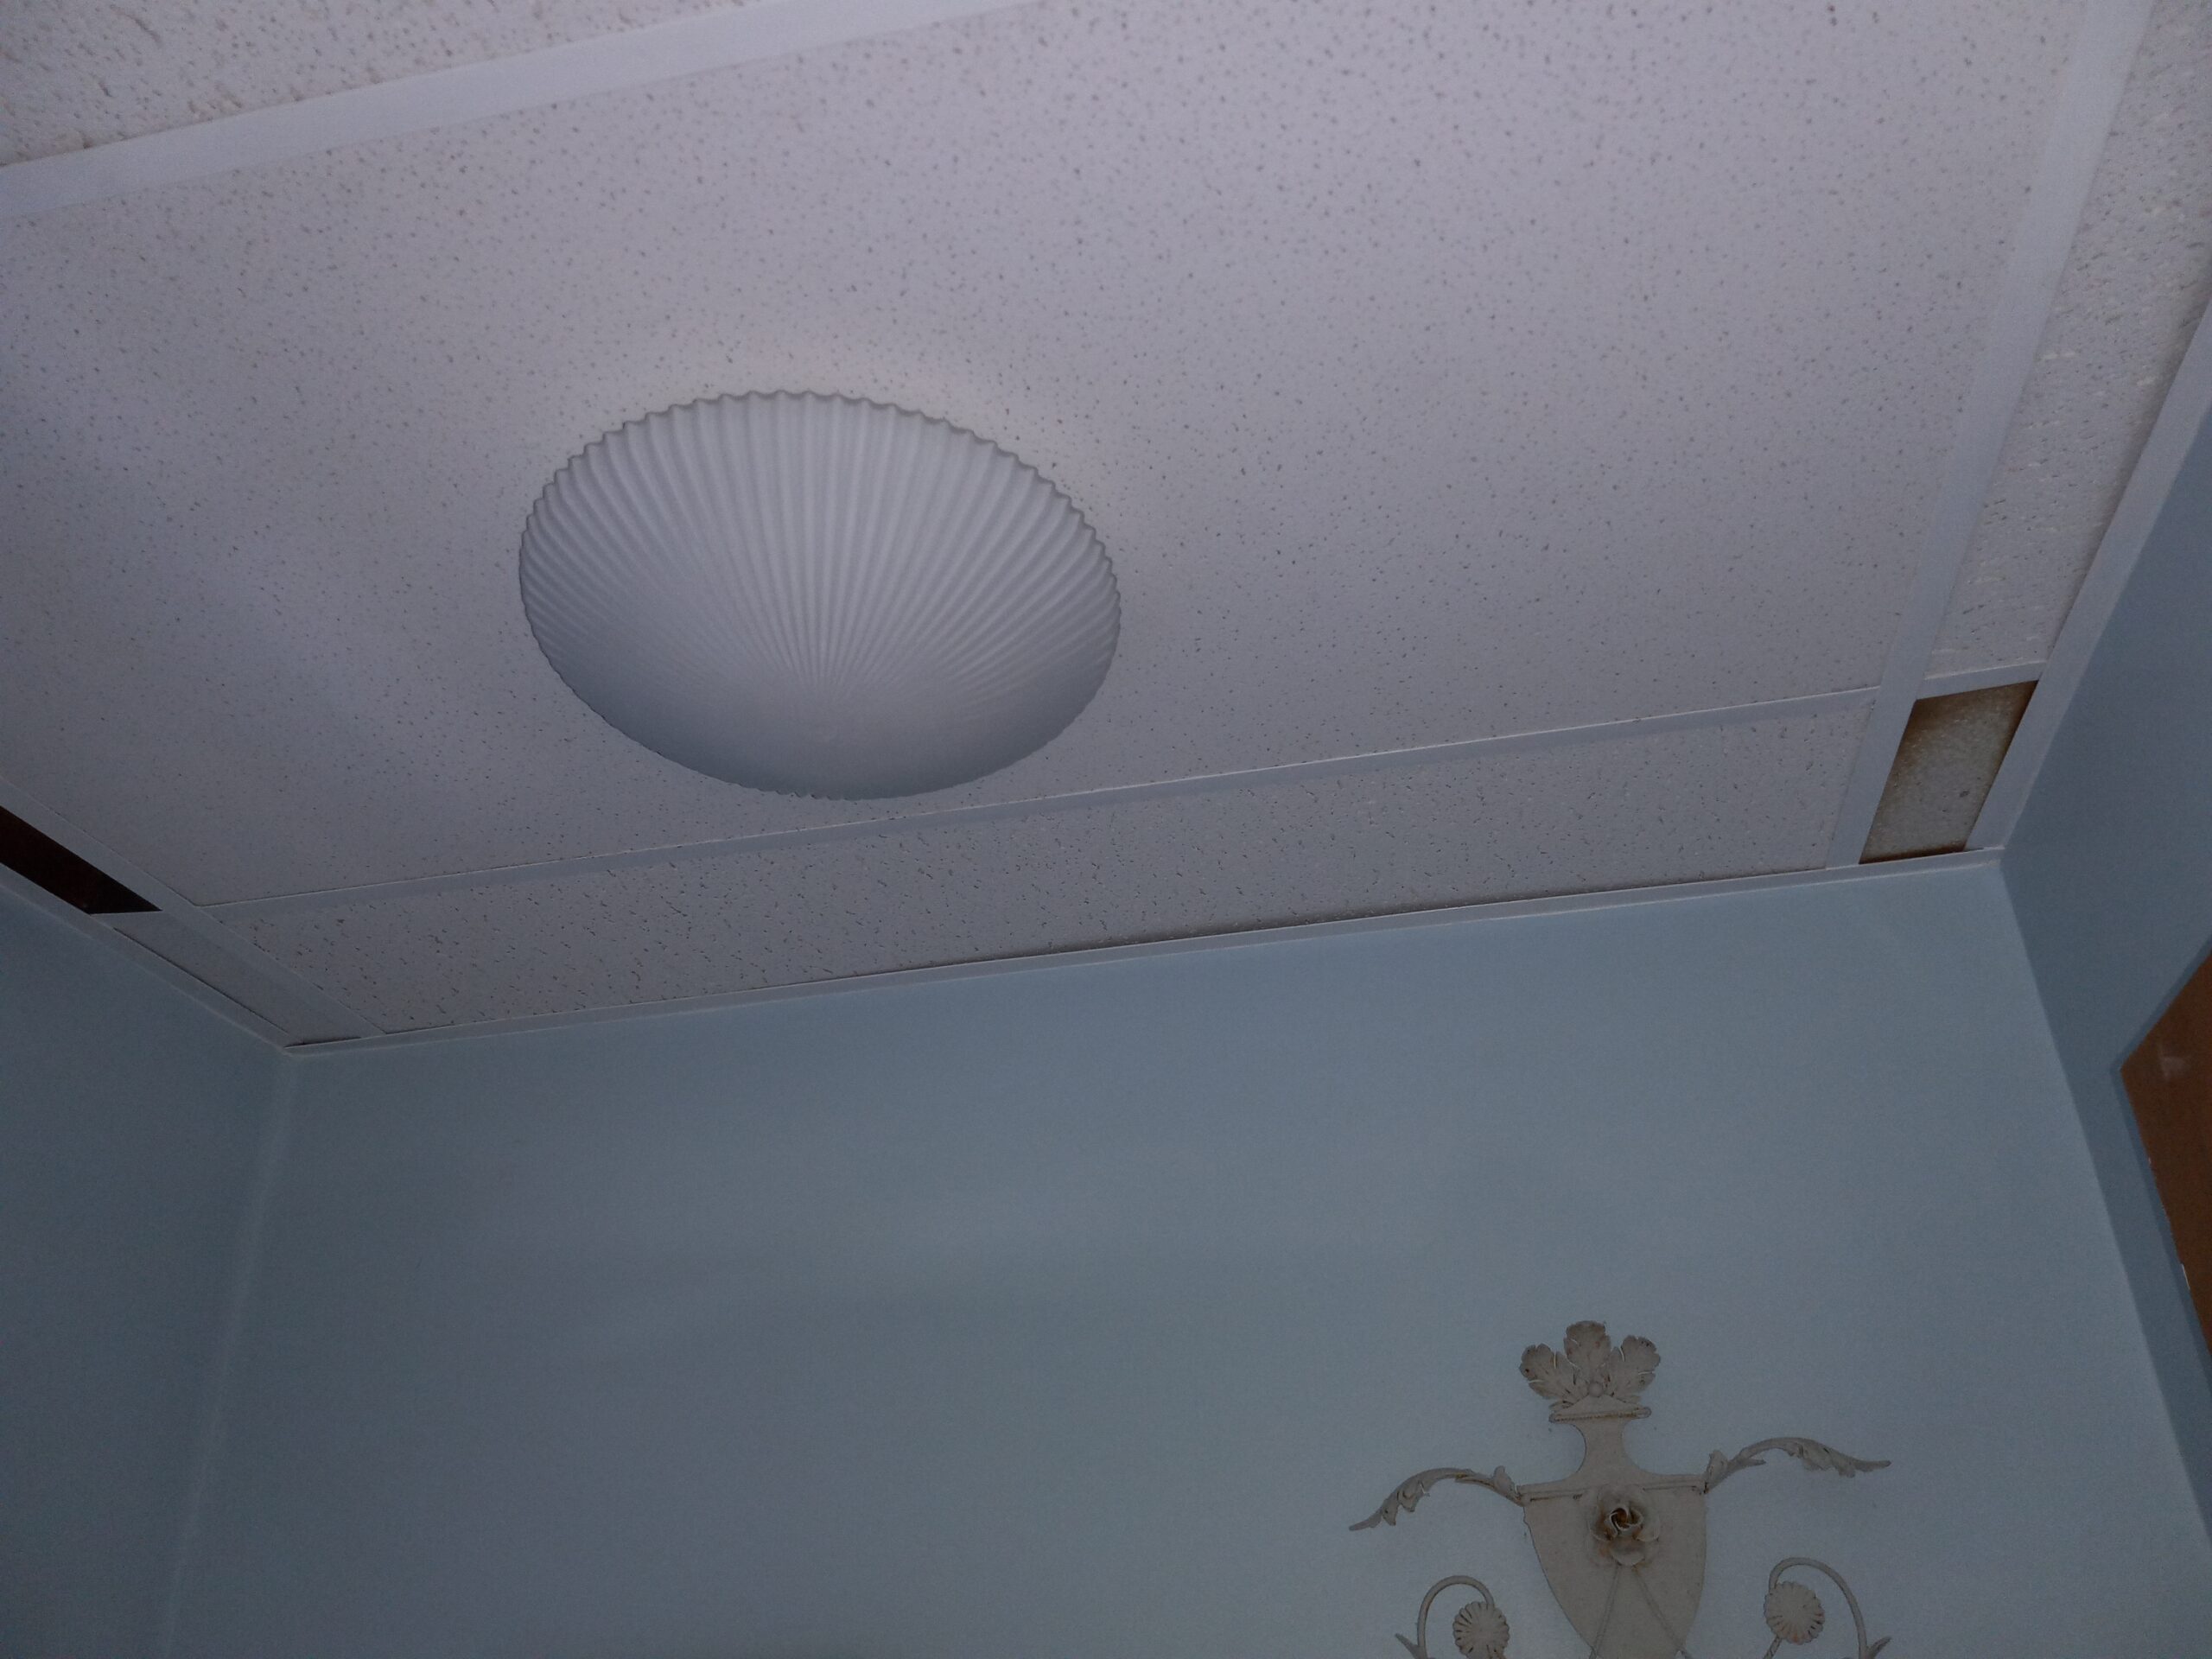
And then a box of all new matching tiles arrived, here it is all done:

Constantly Learning New Things (Pressure Treated Wood etc.)

Today, dear reader, I shall share the latest arc in my ongoing learning curve.

A regular client called and asked me to paint a pergola. Like me, you may be asking, what is a pergola . . . well it’s a structure with joists across the top that holds things like grapevines.

So, being a handyman, I am no stranger to painting projects, so I figured, no big deal. These are the famous last words of many a dead handyman.

So my first inkling of things being slightly more than bargained for was when my paint guy looked at the pix and asked, “is this thing made of pressure treated wood?” Turns out it was, and that’s when I first started to learn all the mystical hidden ins and outs of painting pressure treated wood. Mostly, what you need to know is, you can’t paint pressure treated wood when it is brand new. The chemicals that were infused into the wood need to off gas or dry out or something. Anyway, you have to wait a few weeks or months (I think– I never got a clear answer on this). It’s also a good idea to sand it first. I gather. There are no signs posted anywhere near the pressure treated wood at the lumberyard to tell you any of this.

Next, and I kinda sorta knew this but not really, sometimes these “kits” for such sizable structures come with the wood for the project already primed. This is great (I guess) but it creates a major trap for the unwary: the thing is white, so it’s easy think it’s all set, BUT . . . primer is NOT DESIGNED TO BE A TOPCOAT and (as I understand it) you have about a month to buy and apply some kind of topcoat that is NOT primer, to cover said primer. If you don’t, and I have actually seen this many times, the primer will be overly exposed to UV light and moisture etc and it will start to disintegrate. It peels and flakes and turns to chalky gunk, all of which has to be sanded down to solid layers and primed again before painting.  So it had either come pre primed or the previous owner primed it, but whoever did it, they did not wait for the wood to dry OR they failed to topcoat it, or maybe they primed it when it was wet from rain . . .   and that’s why it all flaked off . . . I guess.   Below, how it looked day one before being scraped and sanded:

So anyway, it took me a full day just to scrape and sand off this old gunky peeling primer and get down to a nice solid surface. And of course I had to prime this thing all over again, and I chose my fave primer, Zinnser Bullseye. But as I got closer to the day, I was informed by Zinnser corporate help that the surface has to be dry, as in 2 days of no rain before painting, OR less than 12% moisture content. I had no idea this was such a big deal. Now I know.

Below, midway through the sanding process:

And, finished, with a low lustre Benjamin Moore Aura topcoat:

I also had a project in the pipeline of painting a wrought iron railing for another customer, but Rustoleum help said “sorry, not so fast” . . . for their OIL based paints, turns out both the primer and the paint need a full 24 hours ABOVE 50 Degrees to dry/cure properly. On that job it did not matter if it rained the night before but it mattered very much if it rained or went below 50 degrees the 24 hours after application. . . . and THEN I learned that, once I put on the rustoleum primer, and once I wait the 24 hours for it to cure, I have just 6 days to put on a top coat, (which then needs a dry 24 hours above 50 degrees) . . And if I miss any deadlines I am screwed and I have to wire wheel down to bare metal and start all over again.

These little procedural details are very important to achieving optimal results, but these oh so important rules and procedures and instructions are in very fine print on the back of the can . . . and of course no mention of pressure treated wood anywhere . . . handyman work has turned me into a very cautious and suspicious person. More than once my paranoia has saved me from disaster.


Lint Lint Lint

One of the greatest shortcomings in house design and construction has to do with fans and the movement of air in general:

The fan you see above just happens to be in my own apartment bathroom, but there are millions of these all over everywhere.  And a lot of them . . .  just don’t work.

Of course, if you turn them on, it will spin around and make fan sound, but if you perform the acid test, which is, if you hold 2 squares of toilet paper against the vent and then take your hand away, most times the toilet paper with just fall to the ground.  If it does that, you immediately know there is no suction of air occurring.  It’s fan theater.

Oh sure, they worked when they were first installed, but then, as the damp air from the shower gets sucked out, the lint and dust that is also in the air hits the water on the fan blades and sticks there, and over time it builds up.  And as it builds up, it eventually distorts the curve of the “squirrel cage” fan blades and renders them useless.  Sort of like icing on airplane wings.  And, not to pile on, if that fan stops functioning, you get moisture buildup, and thus mildew and mold.

The only fix I know of is to get up there with a vacuum and clean it out one blade at a time:

This takes us to a broader topic having to do with customer relations.  I personally hate it when people “upsell” me and I never do that to clients.  Handymanning is a consulting job, and the relationship, and mutual trust, is key.  But then there’s the conflict of knowing that in every new customer house I walk into, there is an 80% likelihood that every fan in that house is somehow gummed up with lint, and the function of that fan is compromised.  This includes bathroom vents, window air conditioners,  furnace blowers, clothes dryer vent pipes, and perhaps worst of all, refrigerators.  And now here is Justin looking like he is pressuring you into buying something you didn’t think you needed or wanted.

The hell of all this, I don’t want this job.  I do not like to clean.  I fix, I don’t clean.  But in this arena, cleaning is fixing and making things work.  It is also saving energy and carbon dioxide emissions.  Plus, the life of your appliances is shortened when gunked up fans and air filters are making the thing run 50% longer than it needs to.    And I did not even mention what all that dust does to your lungs as it gets constantly blown thru your house.  So I put up with it, as virtually no “house cleaning” service addresses this kind of thing.

Trouble is, the average home owner is simply not at all educated on this need for preventive maintenance.  The manufacturers don’t care, they would rather you remain ignorant and be forced to just buy all new everything.  So, dear reader, I put it to you: should I not risk sounding like a pesky car salesman selling rust proofing, or do I bring it up and suggest that folks address the lint in their house that is killing their appliances, crudding up their lungs and sinuses,  and costing them $10 a month in extra electricity?

____________________________________________

Addendum:

After posting this blog I had a regular client call about something else and while there I suggested that we look at her bathroom ceiling fan.  I pulled off the cover and this is what I found:


  Again, when those curved fan blades get all coated with a layer of dust they become totally non-functional.  This took a while but I got enough crud off the blades to at least to make the thing work again,

I need to go back with a better tool to get more crud out.   But, below, you can see the proof of the pudding, at least there is enough air movement now to hold a piece of toilet paper in place.

Lock Picking 101 (I’m a Beginner)

Whenever I run a craigslist ad for my handymanning services, I often list “basic locksmithing” as one thing I can do.    Please note, I have a brother who is a master master locksmith so I know full well that I am not such.  But all too often, while I am doing a job, a client will ask, “can you fix THIS?”  and they will point to a doorknob.  So bit by bit, in the “learn by doing” philosophy, I have acquired some very basic locksmithing skills.  These consist mainly of replacing doorknobs, swapping out deadbolt locks, pulling mortise locks (and having a real locksmith replace the innards) and fixing strike plates.  So over time, as more and more clients asked me to fix more and more broken knobs, I started to accumulate basic locksmithing skills.  There is actually a lot to know, even at that basic level.

That said, when the pandemic first hit, it became pretty obvious that handymanning work was going to slow down and I would have some extra time on my hands. So I decided that would be a perfect time to do some things I had always intended to do.

One of these was to learn to play folk guitar, another was to figure out how to dance country 2-step, and the last was . . . How to pick locks.

I can’t remember what made me want to learn lock picking. I probably surfed into a youtube video by “the lock picking lawyer” and got intrigued.

So I invested in a set of lock picking tools:


You really don’t need much for this kind of thing . . . for basic lockpicking all you need is a “tensioning tool” and a pick. I also bought a “rake” but I rarely use it. And some “top of the keyway” tensioning tools are in the mail.

Now please do bear in mind, I am not any sort of lock picking expert, in fact I would call myself (at best) an advanced beginner. I managed to stitch together a collection of old used deadbolts and locking knobs and now, instead of knitting or whittling, whenever I find myself sitting in my easy chair, I compulsively grab a lock and proceed to pick it. Or at least try to. I have successfully picked 80% of the locks I own, at least once. Still, it is a very hit or miss proposition, I have not achieved any mastery so far. But, gotta start somewheres.

The process involves sticking your pick in the lock and acquiring a mental picture of the unique setup of the pins. If you could see the pins it would be easy, but you have to figure them out by feel.

I have been told that a good way to stave off dementia and senility is to keep learning new things. This project is certainly doing that.