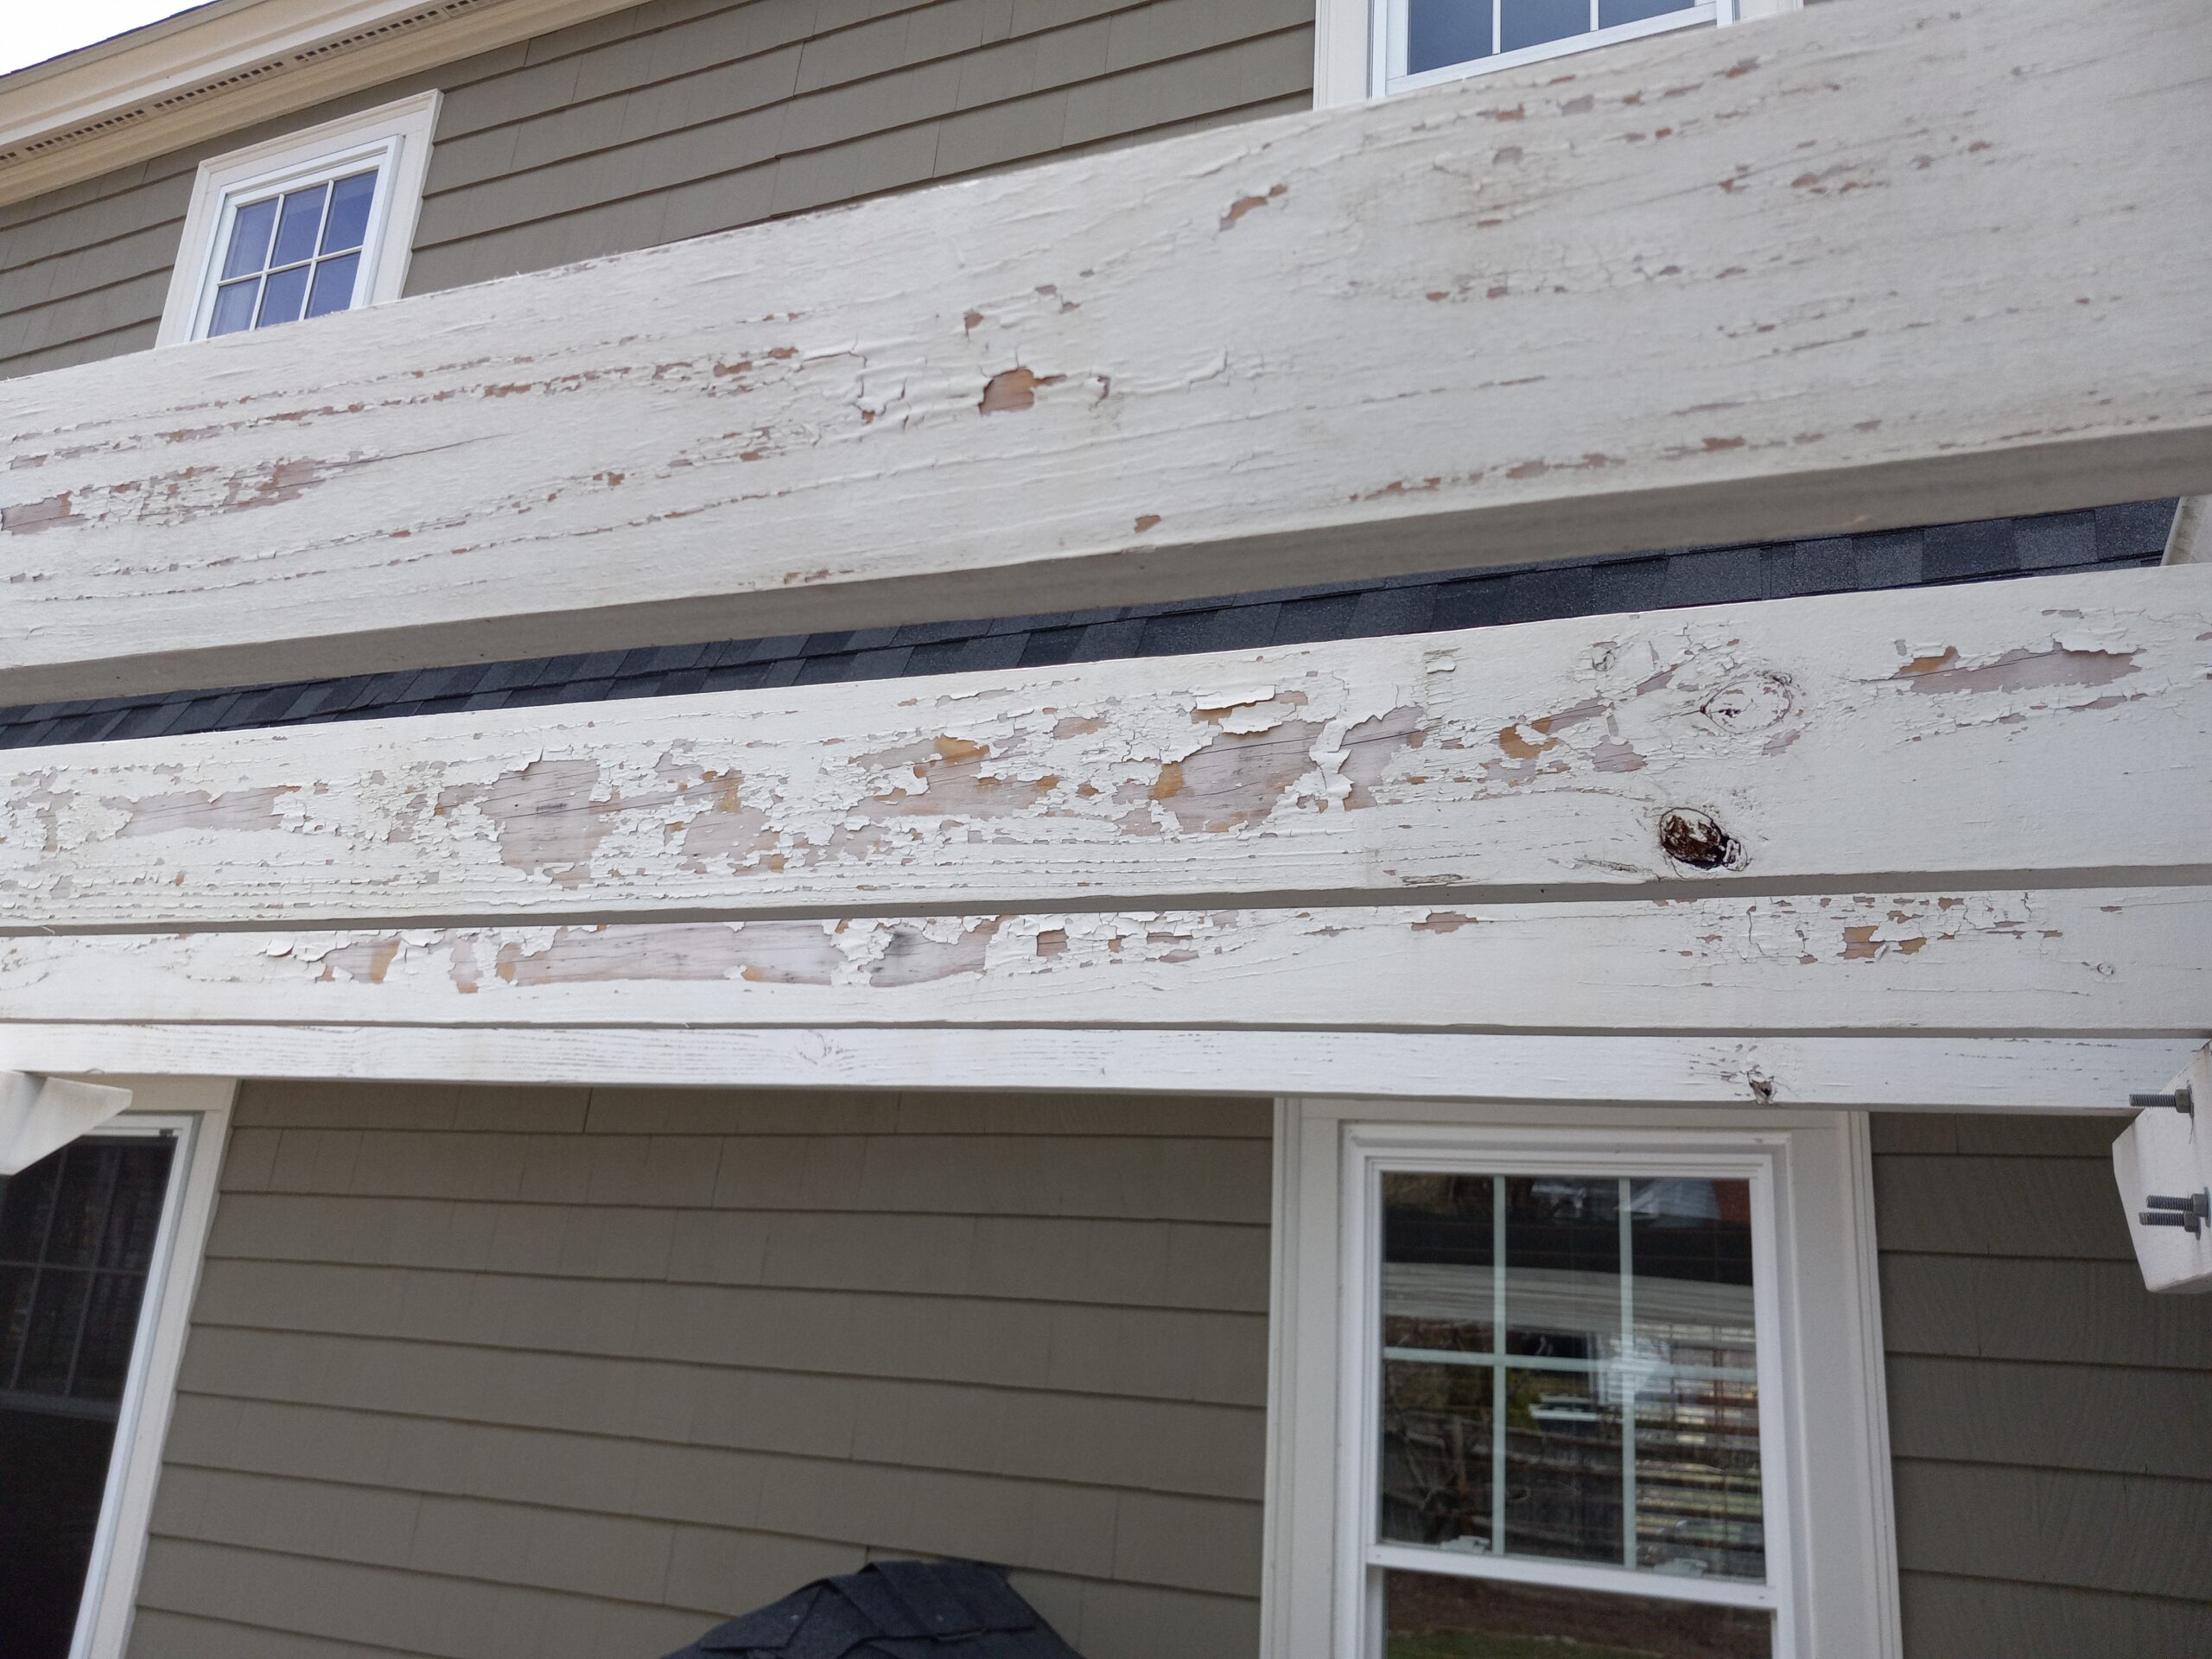
Today, dear reader, I shall share the latest arc in my ongoing learning curve.
A regular client called and asked me to paint a pergola. Like me, you may be asking, what is a pergola . . . well it’s a structure with joists across the top that holds things like grapevines.
So, being a handyman, I am no stranger to painting projects, so I figured, no big deal. These are the famous last words of many a dead handyman.
So my first inkling of things being slightly more than bargained for was when my paint guy looked at the pix and asked, “is this thing made of pressure treated wood?” Turns out it was, and that’s when I first started to learn all the mystical hidden ins and outs of painting pressure treated wood. Mostly, what you need to know is, you can’t paint pressure treated wood when it is brand new. The chemicals that were infused into the wood need to off gas or dry out or something. Anyway, you have to wait a few weeks or months (I think– I never got a clear answer on this). It’s also a good idea to sand it first. I gather. There are no signs posted anywhere near the pressure treated wood at the lumberyard to tell you any of this.
Next, and I kinda sorta knew this but not really, sometimes these “kits” for such sizable structures come with the wood for the project already primed. This is great (I guess) but it creates a major trap for the unwary: the thing is white, so it’s easy think it’s all set, BUT . . . primer is NOT DESIGNED TO BE A TOPCOAT and (as I understand it) you have about a month to buy and apply some kind of topcoat that is NOT primer, to cover said primer. If you don’t, and I have actually seen this many times, the primer will be overly exposed to UV light and moisture etc and it will start to disintegrate. It peels and flakes and turns to chalky gunk, all of which has to be sanded down to solid layers and primed again before painting. So it had either come pre primed or the previous owner primed it, but whoever did it, they did not wait for the wood to dry OR they failed to topcoat it, or maybe they primed it when it was wet from rain . . . and that’s why it all flaked off . . . I guess. Below, how it looked day one before being scraped and sanded:
So anyway, it took me a full day just to scrape and sand off this old gunky peeling primer and get down to a nice solid surface. And of course I had to prime this thing all over again, and I chose my fave primer, Zinnser Bullseye. But as I got closer to the day, I was informed by Zinnser corporate help that the surface has to be dry, as in 2 days of no rain before painting, OR less than 12% moisture content. I had no idea this was such a big deal. Now I know.
Below, midway through the sanding process:
And, finished, with a low lustre Benjamin Moore Aura topcoat:
I also had a project in the pipeline of painting a wrought iron railing for another customer, but Rustoleum help said “sorry, not so fast” . . . for their OIL based paints, turns out both the primer and the paint need a full 24 hours ABOVE 50 Degrees to dry/cure properly. On that job it did not matter if it rained the night before but it mattered very much if it rained or went below 50 degrees the 24 hours after application. . . . and THEN I learned that, once I put on the rustoleum primer, and once I wait the 24 hours for it to cure, I have just 6 days to put on a top coat, (which then needs a dry 24 hours above 50 degrees) . . And if I miss any deadlines I am screwed and I have to wire wheel down to bare metal and start all over again.
These little procedural details are very important to achieving optimal results, but these oh so important rules and procedures and instructions are in very fine print on the back of the can . . . and of course no mention of pressure treated wood anywhere . . . handyman work has turned me into a very cautious and suspicious person. More than once my paranoia has saved me from disaster.


